

Email branding in Signority allows administrators to customize the notifications sent by your organization. Instead of using the default Signority content, you can define custom subject lines, footer text, and more—ensuring every email reflects your brand and provides clear context for recipients.
Access and Enable Email Branding Settings
-
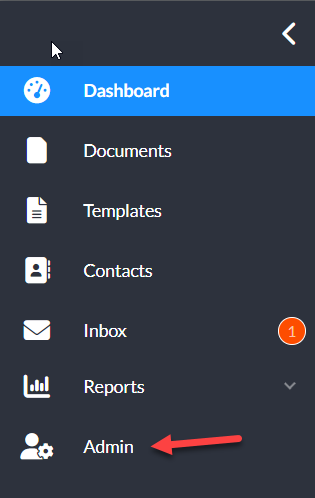
From the user dashboard, navigate to the Admin Console by selecting Admin on the left sidebar menu.
-
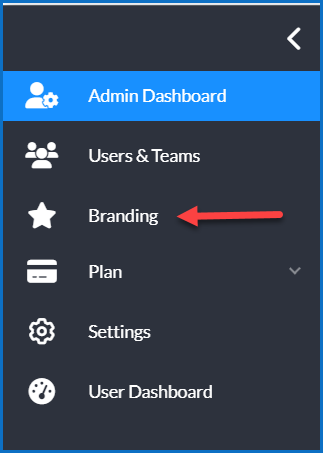
In the Admin Console, select Branding from the revised side menu.
-
In the branding window, check the box next to Use Company Branding to enable email customization.
Configure Email Branding Settings
Configure the following elements for all outgoing email notifications from your team:
Email Logo
Upload your company logo to appear at the top of all emails. This helps recipients recognize your organization and builds trust.
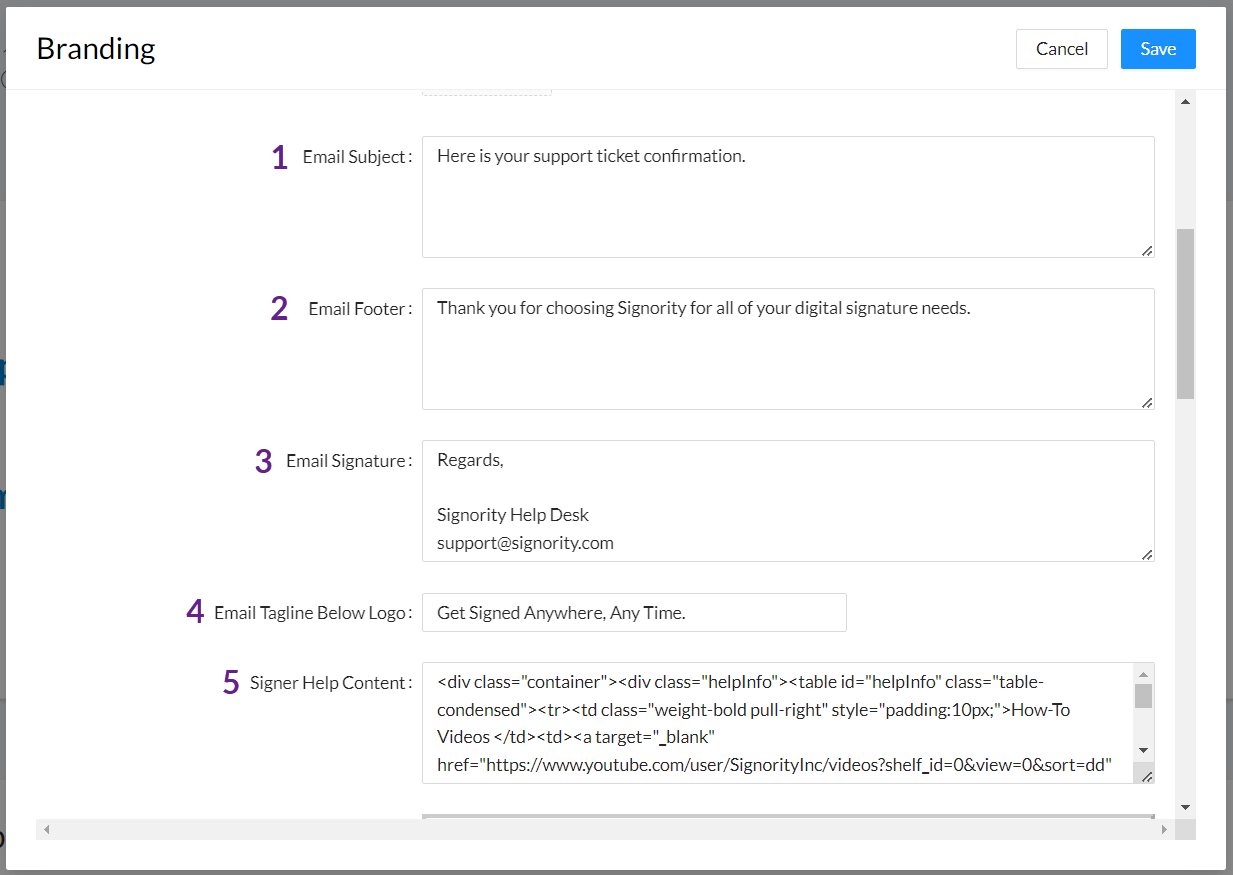
Email Subject
Set a default subject line to replace Signority’s default. This subject will apply to all document-related notifications, with system-generated suffixes added depending on the signing stage.
-
You can use the placeholder {DocumentName}, which automatically inserts the document’s name when emails are sent.
-
Note: This differs from the subject users enter when sending a document, which only applies to invitation and reminder emails.
Email Footer
Replace the default footer with your own content, such as contact details or legal disclaimers.
Email Signature
Create a standard signature applied to all users.
Note: This will override individual user signatures they have set in their account settings prior. If you want to prevent them from changing it again, you can lock the setting by selecting the lock icon next to Email Signature.
Email Tagline
Add a short tagline that appears beneath your logo.
Signer Help Content
Provide custom instructions or guidance to help recipients complete the signing process.
In the branding pop-up window, you can define the following content for your email notifications sent by your team:
Preview and Save
-
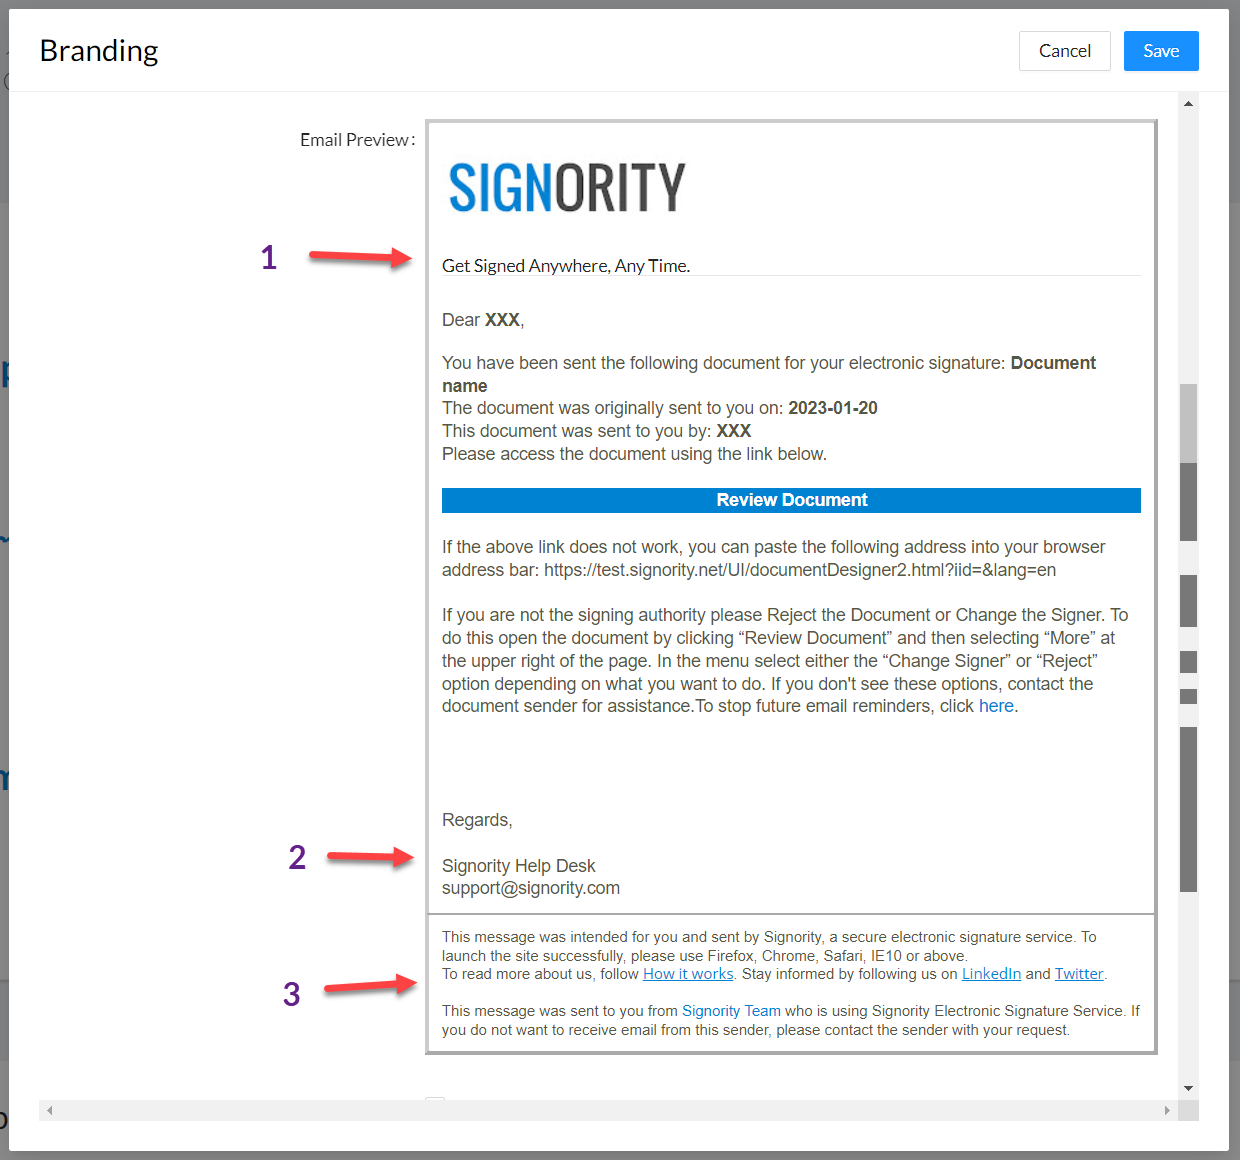
Beneath the email customization, you will see a preview of your email with the tagline (1) , signature (2) and footer (3).
-
Click Save in the top-right corner to apply your changes.