

Now that your regular templates are ready to be used, there may be cases when a process involves multiple related documents that need to be completed together as part of a single workflow. By combining them into one document, users can keep everything organized, ensure the correct order and structure, and guide recipients through a unified signing experience.
Creating a Document with Multiple Templates
-
From the User Dashboard, select Templates from the left navigation menu.
-
Locate one of the templates you wish to use and then click on the Use Template button to the right of that templates row.
-
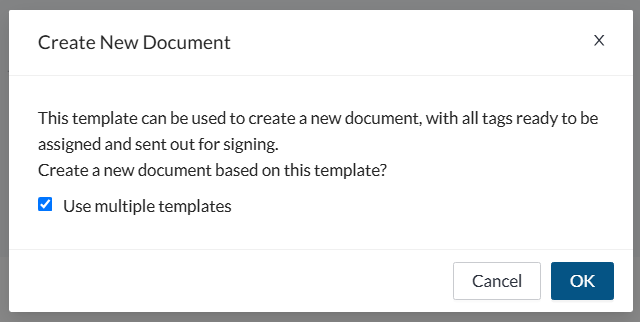
In the pop-up window a window, select the box next to Use multiple templates.
-
Click OK.
-
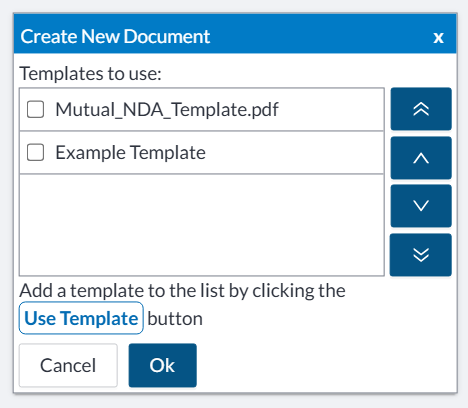
A window named Create new Document will open. Drag the window aside until you can view the Use Template buttons.
-
Click Use Template for any of the templates you wish to add to the document. Once you do, they will appear on the Create new Document window.
-
The order that templates are listed is how they will appear in the created document. To reorder them:
-
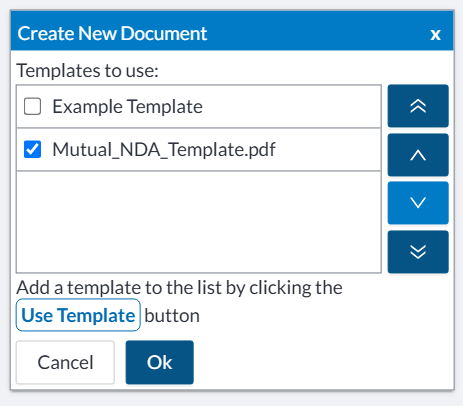
Select the checkbox to the left of the template.
-
Use the arrow keys on the right of the panel to re-order them.
-
-
You can also remove templates by hovering over them and selecting the Delete icon.
-
If you're satisfied with the templates you have selected, click OK to combine all the templates.
You will then be brought to the Editor where you can review that the templates were combined correctly, add the recipients information, and then send.