

Do you often work with dynamic documents like invoices, expense forms, or applications where the content changes each time, but the layout stays the same?
In these instances, the Template overlay can dramatically save you time and effort. Template overlay This feature lets you create a tagged template once, then apply those same tags to new versions of the document whenever needed.
How Template Overlay Works
-
You create a template with all the necessary tags placed exactly where they belong.
-
When you upload a new version of the document, you overlay the tags of the template onto the new document.
What is Applied to the Document from the Template
-
Tags
-
Recipients
What is Applied to the Document from the Template
-
Recipient settings
-
Document Settings
-
Files
Prepare Your Template
Before using Template Overlay, you’ll need to create a regular template using a dynamic document. To set up your template, follow the procedure described in the Creating a Regular Template tutorial.
How to Overlay a Template
Once you have created a regular template, you can use the Overlay feature whenever you create a new document using similar documents.
-
From the dashboard, select the +New > New Document.
-
Uploading the dynamic version of the template you want to overlay. You can follow the procedure described in the Uploading Files to a New Document guide but stop before continuing to the recipients page.
Note: If you are already on the recipients page, click back to return to the upload page.
-
On the right panel, click the Template Overlay.
-
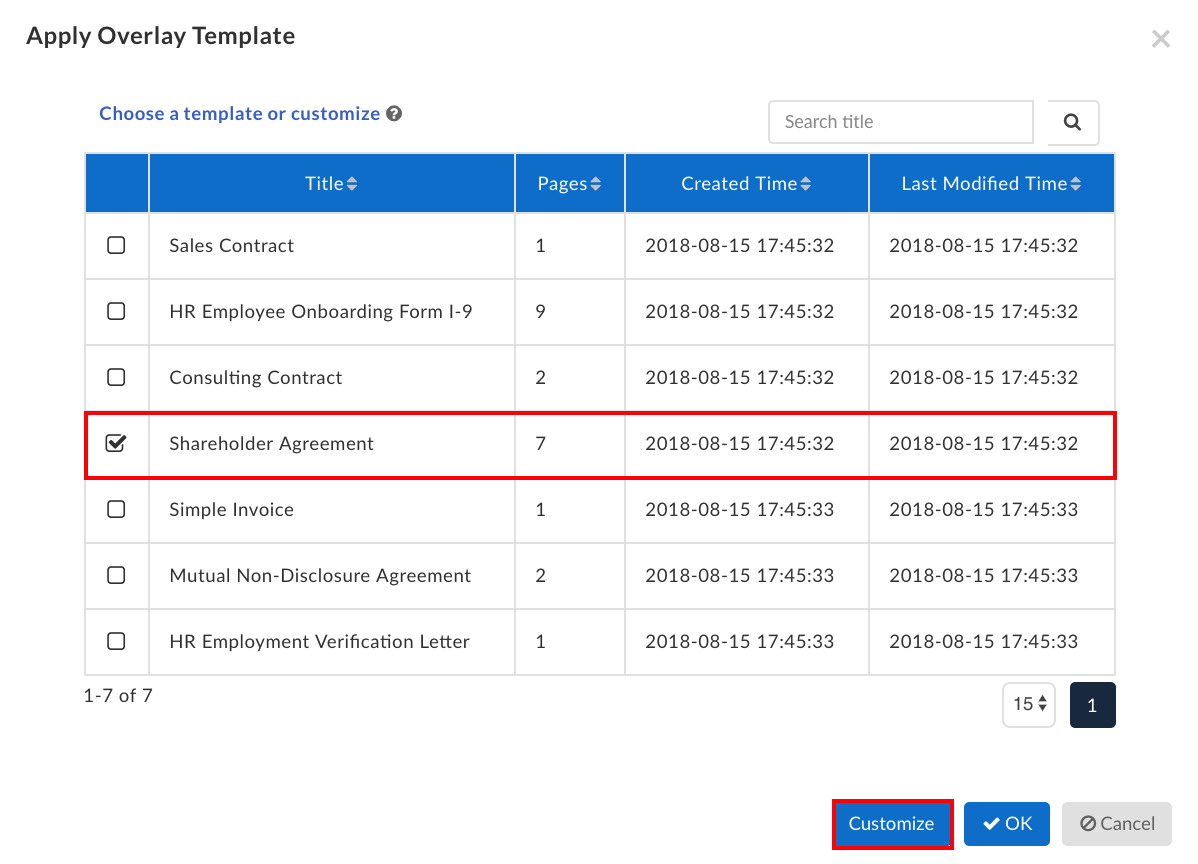
In the pop-up window, select the checkbox next to the template you wish to overlay.
-
You can then either:
-
Select OK to have Signority overlay the template as is starting on page one of the first file in the document package.
-
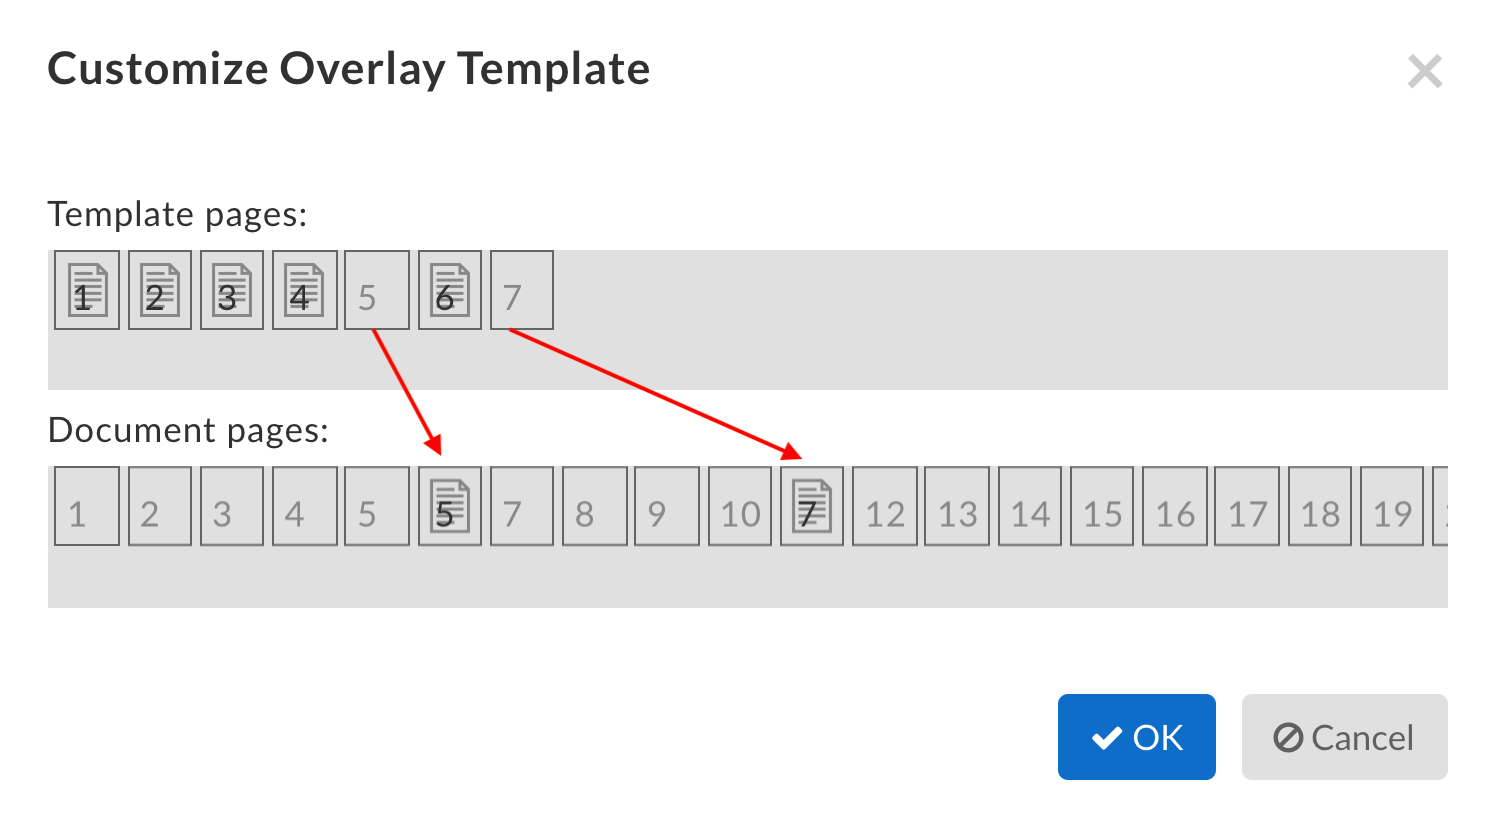
Select Customize to customize exactly what template page is applied to which page in the document by dragging and dropping.
-
-
You can then click Next to proceed to the recipients page. You will notice that the appropriate number of recipients has been automatically been created.
-
Add the recipients names and emails and configure any other recipient settings.
-
Click Next in the top right to proceed to the Editor.
-
Review your document to make sure all of the tags have been overlayed correctly and are assigned to the correct recipient.
-
Add any extra tags you may need, and adjust any settings before clicking Send.