

Regular Templates are pre-prepared documents that you can reuse whenever needed. They are ideal for saving time on frequently used agreements, contracts, or forms.
There are many different ways to set up a template. Unlike when you are creating a new document, you will be bought directly to the Editor. Most of these steps are optional and can be completed in any order. This guide shows the most typical workflow with links to more detailed topics. You may save and use your template at any level of completeness.
Note: Some advanced features and options are supported only in certain Signority plans. Your account plan might not support some options discussed in this article. For more information about which options are available for your account, contact your account administrator.
1. Start a New Template
-
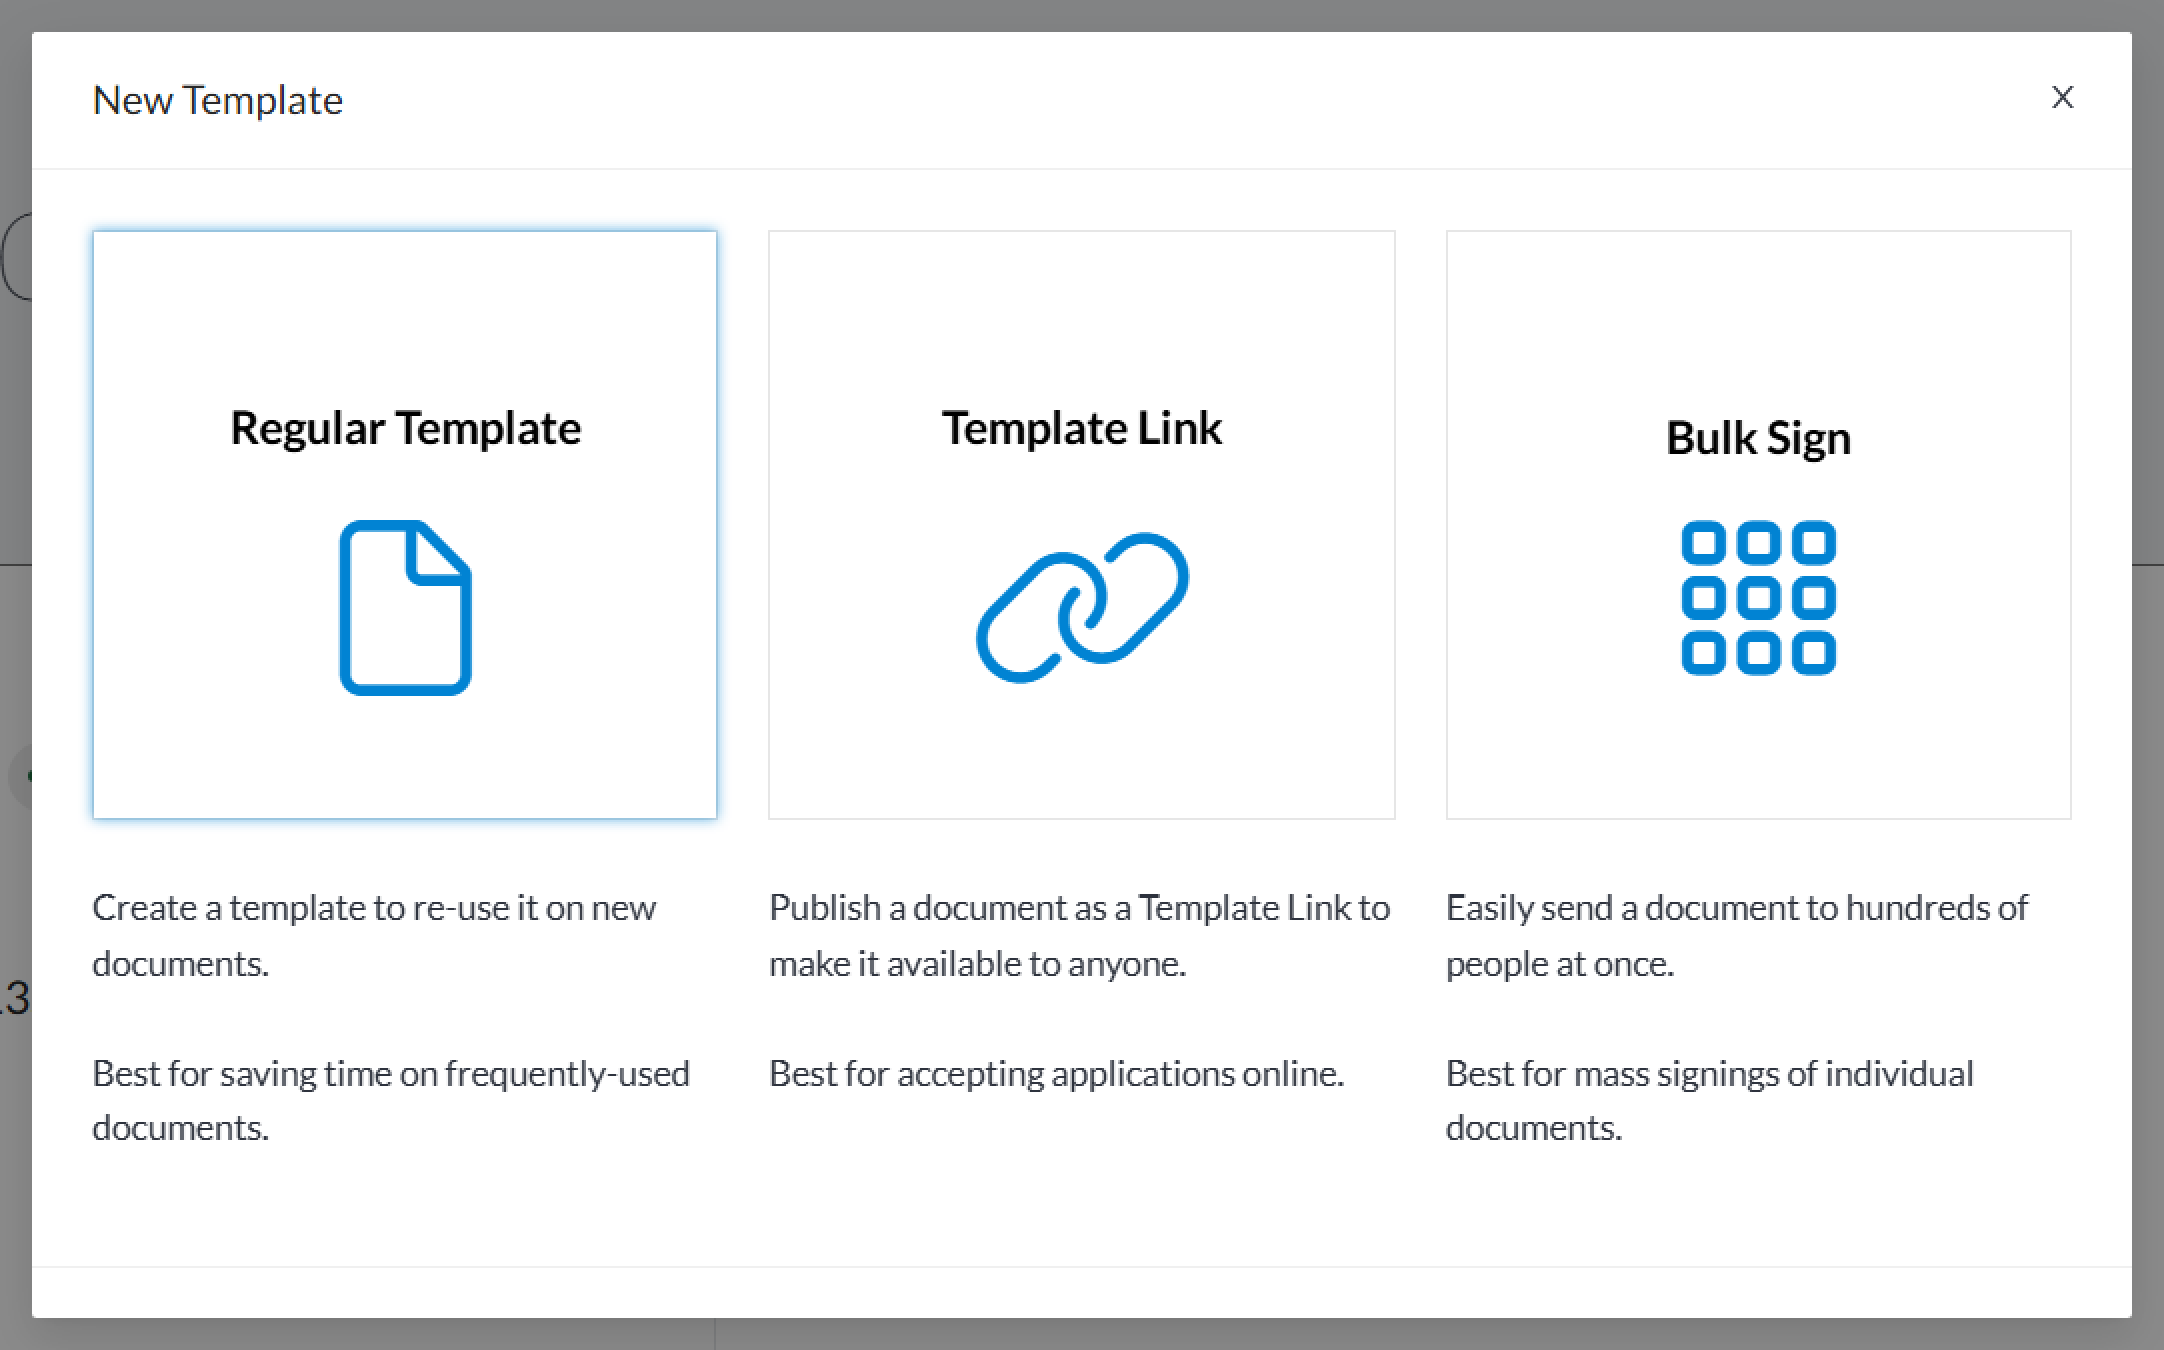
Click + New from the top header
-
Select New Template
-
Choose Regular Template
2. Upload Your Files
-
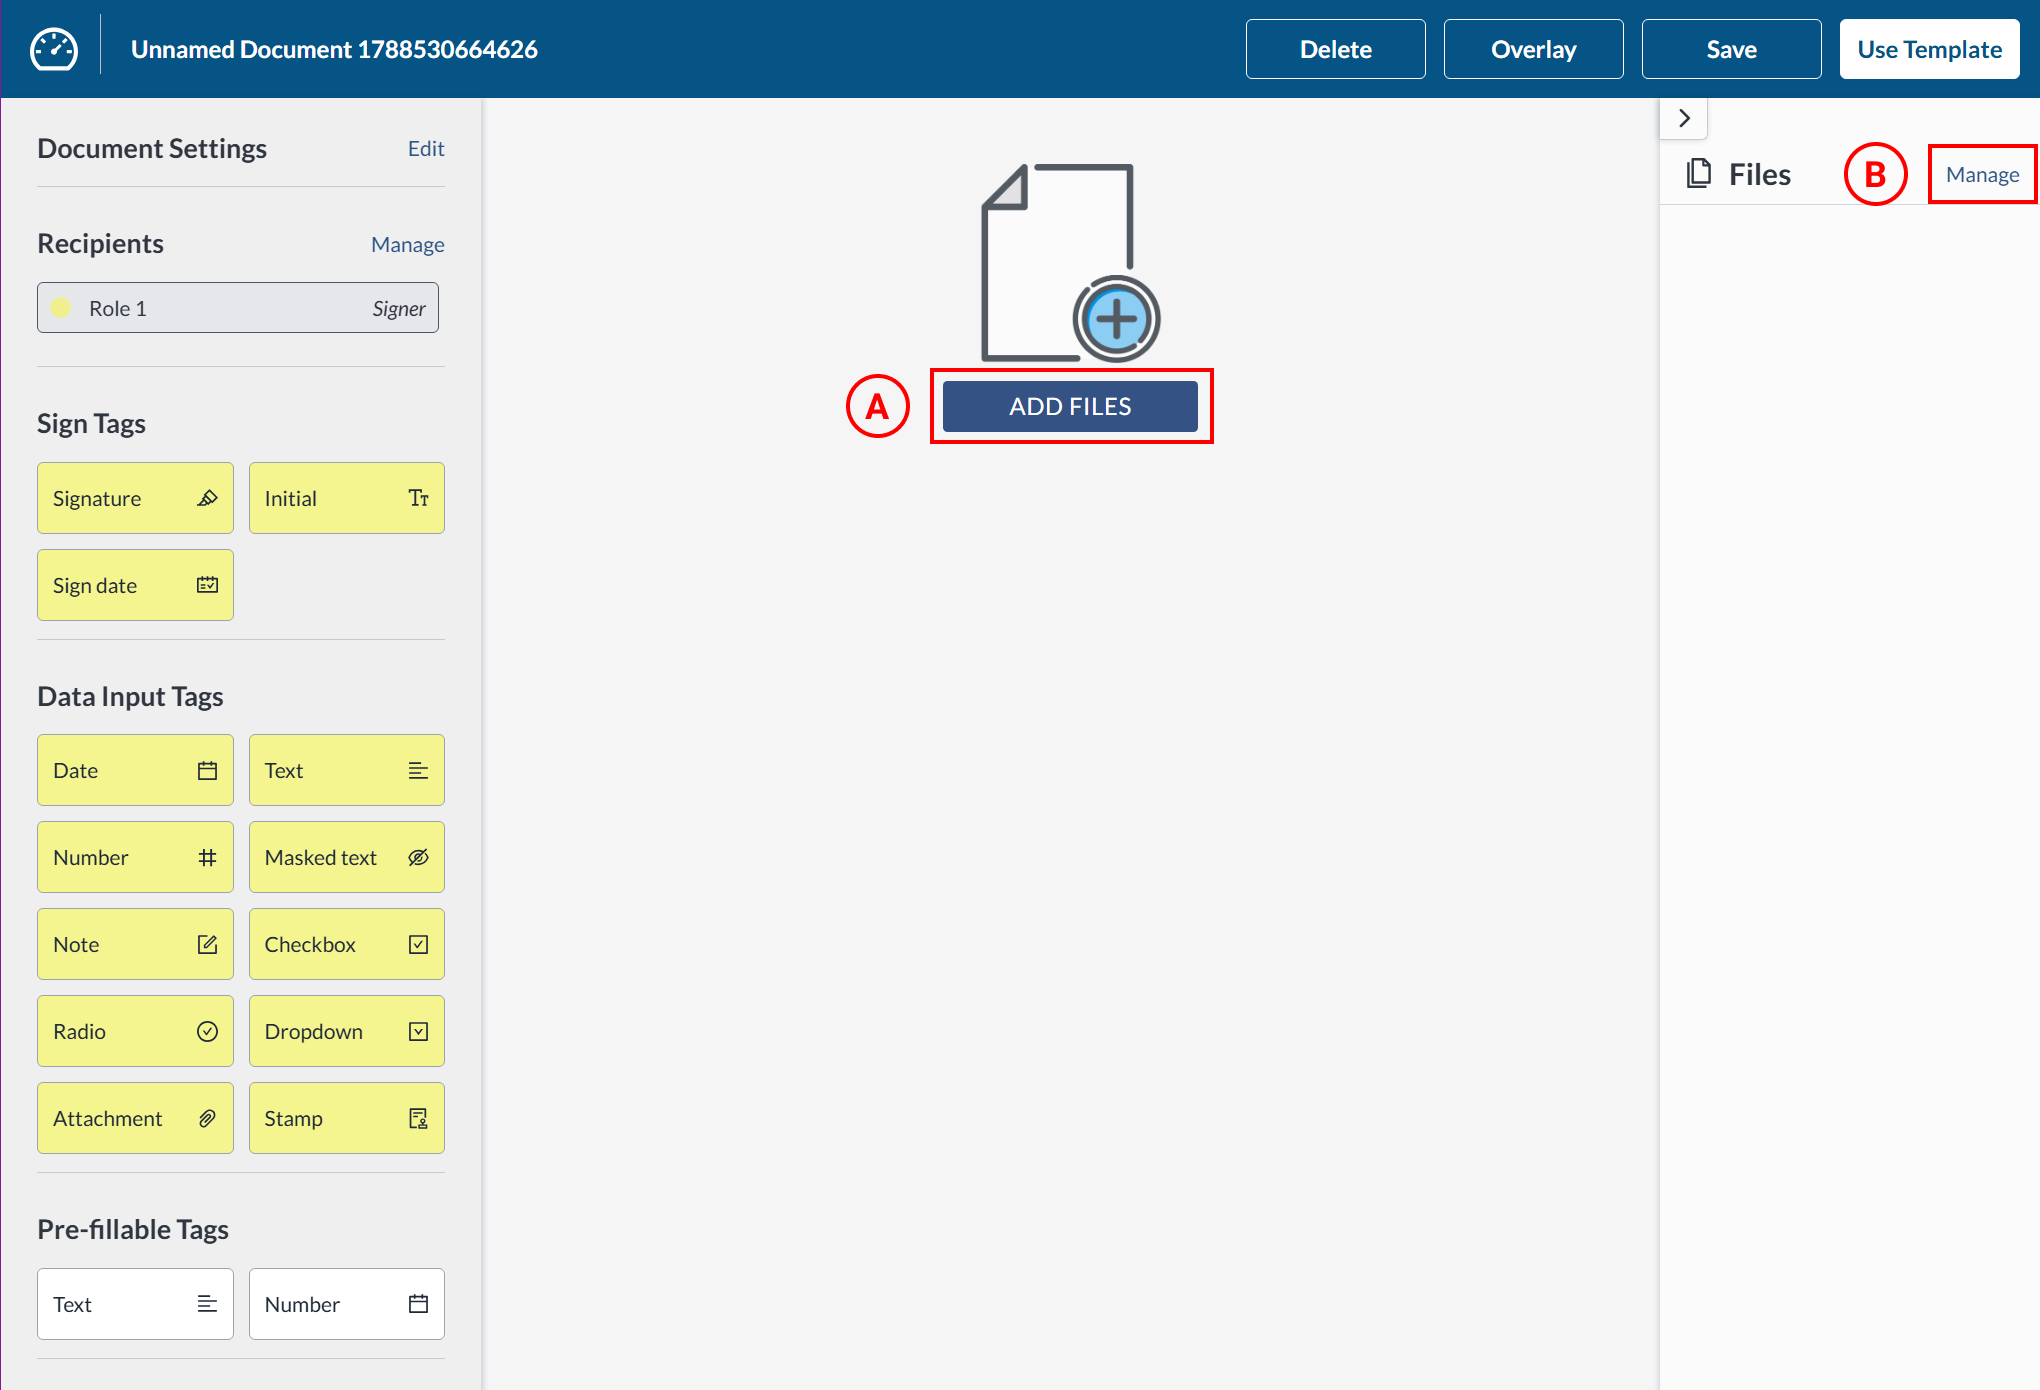
Upload files that will be part of the link sign template by either:
-
Selecting the Upload Files in the center of the Editor, or
-
Clicking Manage next to files in the right panel
-
-
In the Files pop-up window, select Choose Files.
-
Chose your files from your device and select open.
-
Click Close.
Learn more:
3. Add Recipients or Placeholder Roles
Add a recipient for each individual who will be part of the document when you use the template. When you add recipients to regular templates, you have the option to either add named recipients with their name and email as usual, or you can define a placeholder recipient role, such as 'Client', 'Supervisor', or 'CEO', and then enter their specific name and email when you use the template. Add recipients to your template by:
-
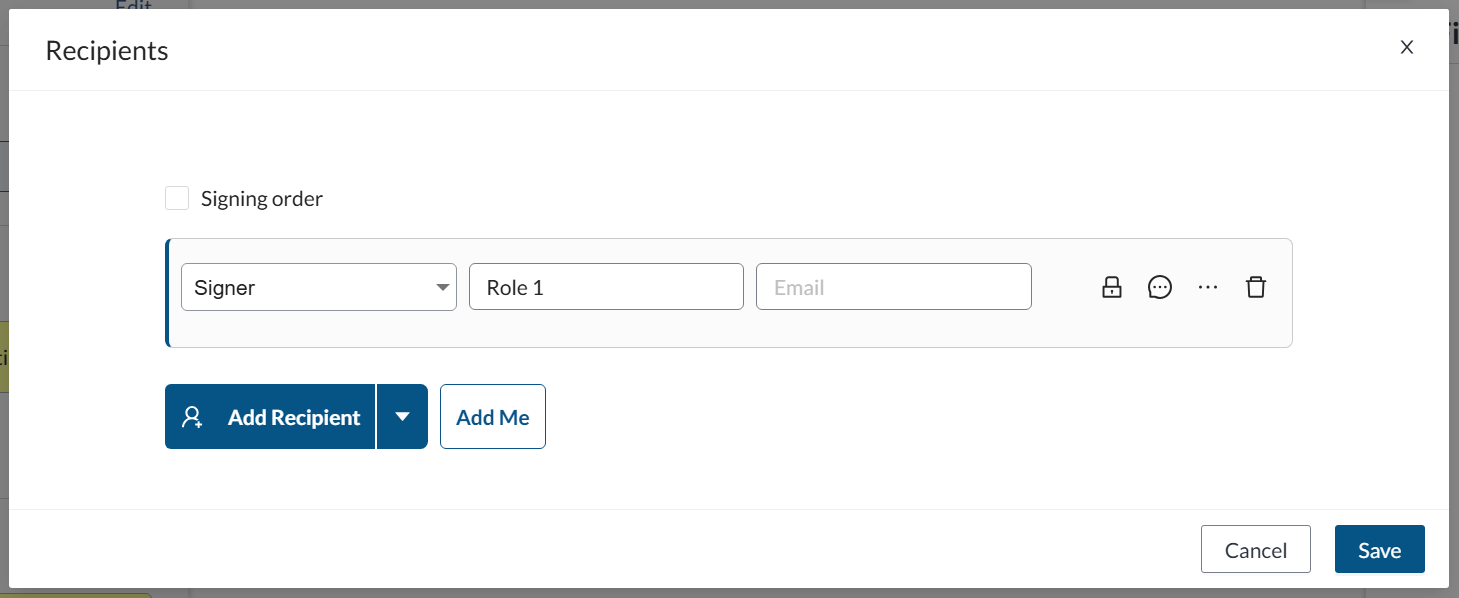
Click Manage next to Recipients in the left panel.
-
You will notice that a Signer Recipient with the placeholder “Role 1” has been automatically created.
-
If you would like to add additional recipients to your template, select Add Recipients.
-
Change the recipients signer type if necessary.
-
Enter the recipients name and email or placeholder role in the Name field.
-
Click Save.
Set Advanced Recipient Settings
You can also enable settings such as private messages and authentication to recipients and leave the information blank to fill in when using the template. Explore the topics below to learn more about the different recipient settings Signority offers and how to set them up:
4. Configure the Default Settings for Documents sent Using the Template
-
In the left panel, click Edit next to Settings
-
A pop-up will appear where you can customize the templates settings which will be the defaults for any documents created using the template. Explore the articles in each settings category:
Title and Email
Notifications
Advanced Settings
-
Enable features like Page View Evidence
Signer Views
5. Add Tags to the Template
Note: You must have at least one file and one recipient before adding tags to a template.
-
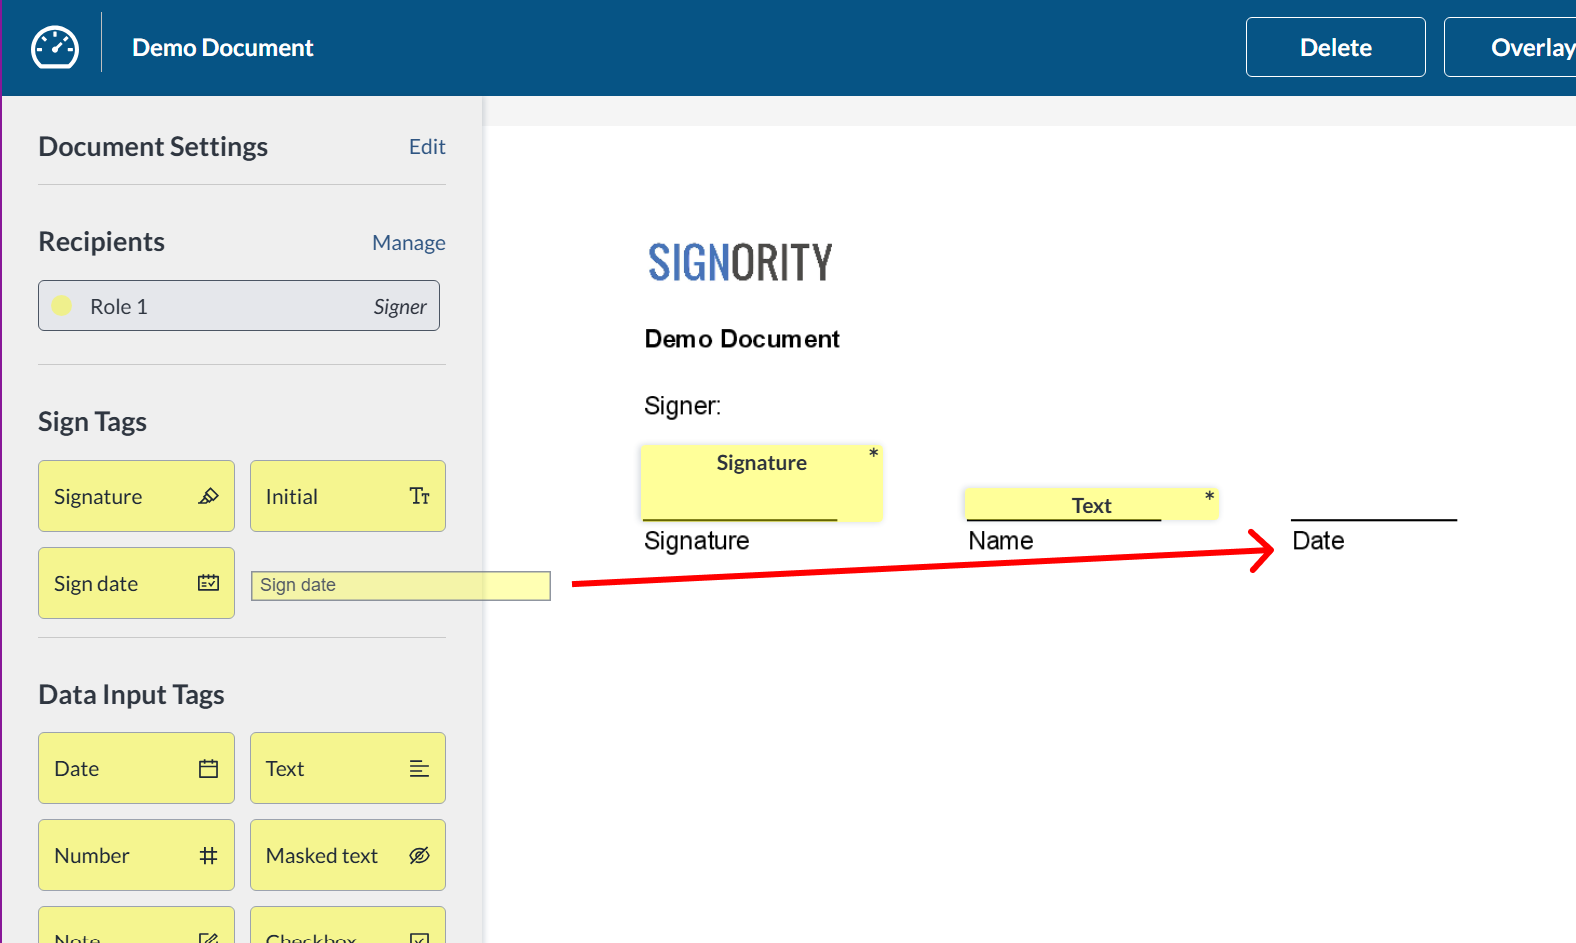
Drag and drop tags onto your document
-
Assign each tag to the appropriate role using the dropdown
For more information on adding tags, see Add Tags to a Document.
6. Finalize your Template
Once you are done setting up your template, in the top right of the header you can chose either:
-
Save to use later, or
-
Use Template to create a new document using your template.
Access and Edit a Template
You can view, edit, or use your templates anytime:
-
From the User Dashboard, select Templates from the left navigation menu.
-
Select the template you want to open or modify.