

Once you start a new document, you will be brought to the Upload page, where you can add files from your device to include in your document package for recipients to sign. Signority supports a wide variety of file formats, and once singing is complete, your finalized package into a PDF.
If you prefer to upload your files later on the editor page, you can skip this step and continue on to the Recipients page by selecting Next in the top right. You’ll be able to upload and manage your files from the editor instead. See, Managing Files in a Document Package for step-by-step instructions.
Note: If your document includes PDF form fields or anchor text, you must select these options before uploading so they can be detected during the upload process. To learn more about this, explore the resources below:
Add Files to Your Document
-
On the upload page, upload your document by either:
-
Dragging and dropping it into the grey area, or
-
Clicking Upload From Computer.
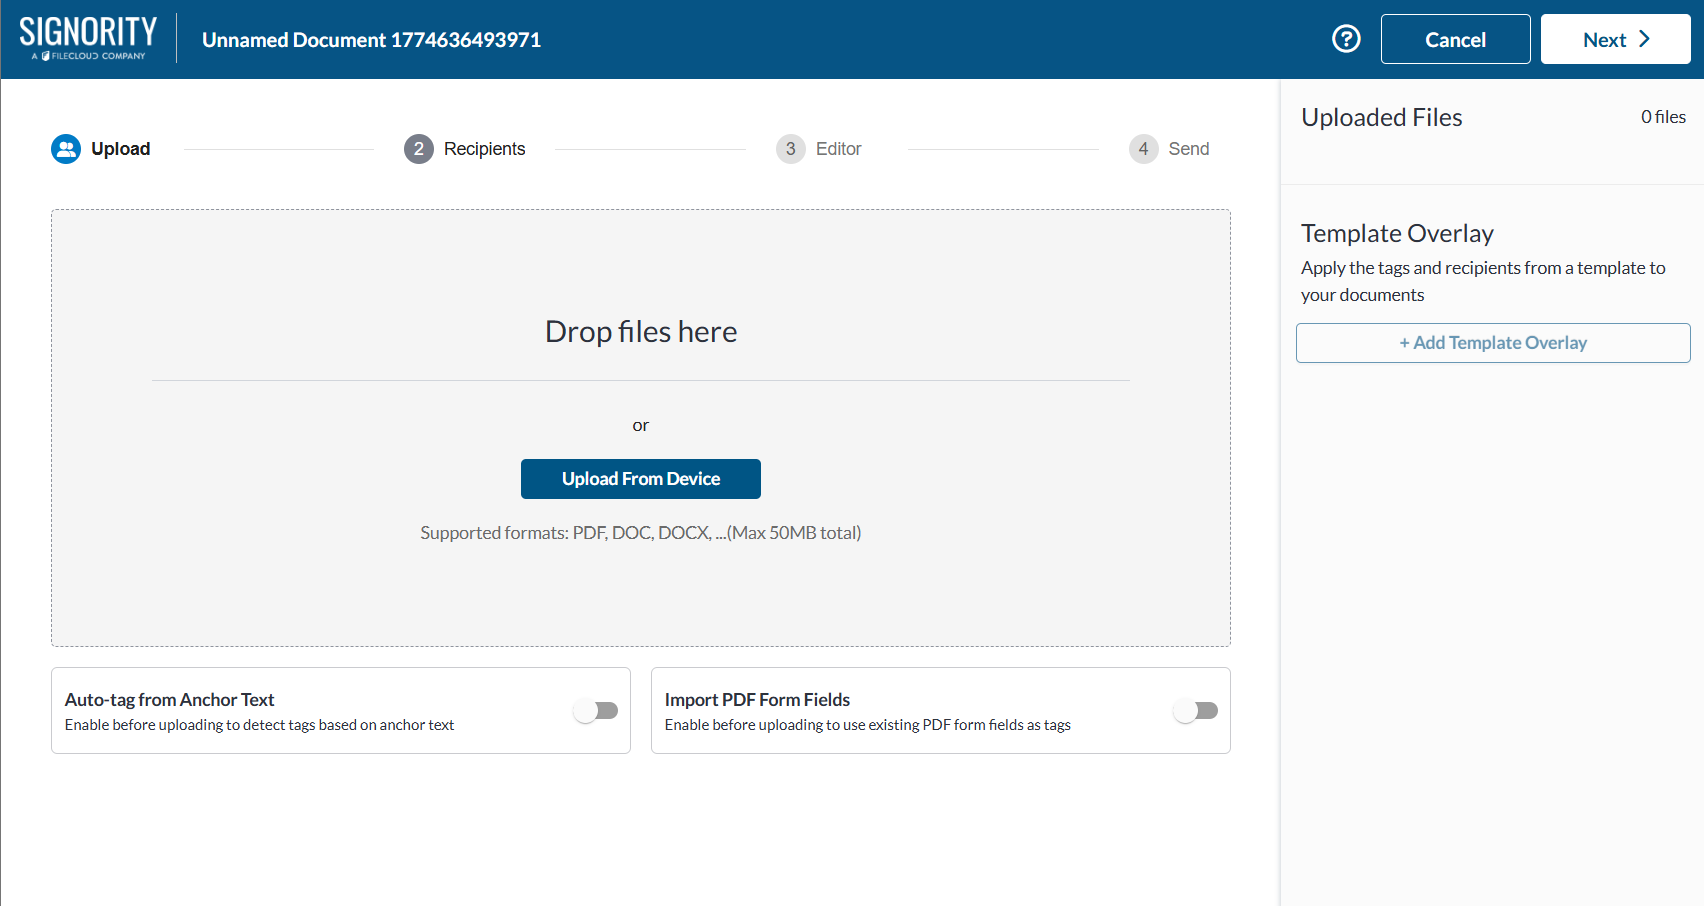
-
Note: Each plan has a document size limit that applies to your uploads. Learn more about file size limits here.
-
After the upload completes, a confirmation message will appear, and the document name will be listed in the right panel under Uploaded Files.
Note: Your document package will automatically be named after the first file uploaded. To learn how to rename your document, see: How to Rename a Document Package.
-
Click Next to go to the Recipients page.
Removing Files
If you uploaded the incorrect file or uploaded one by accident, you can remove a file by selecting the trash icon next to the file name under the Uploaded Files list in the top right.