

Tags are an integral part of Signority's eSignature platform. They are how you collect any kind of information from your signers, so assigning tags to the correct recipient is a crucial part of the workflow.
We'll be going over how to assign tags to the right signers and what they look like for specific types of signers within Signority.
Assigning Tags to a Recipient
After you have uploaded your files and configured your recipients, you are ready to start adding tags to your document.
Note: By default, the tag will be assigned to the first recipient in the list, but as soon as you've switched recipients, we'll assign new tags to the most recent recipient.
-
On the Editor page, locate the page you want to add tags to by either scrolling or using the page thumbnails on the right of the Editor.
-
On the left panel, under Recipients select the recipient who you want to add tags for.
-
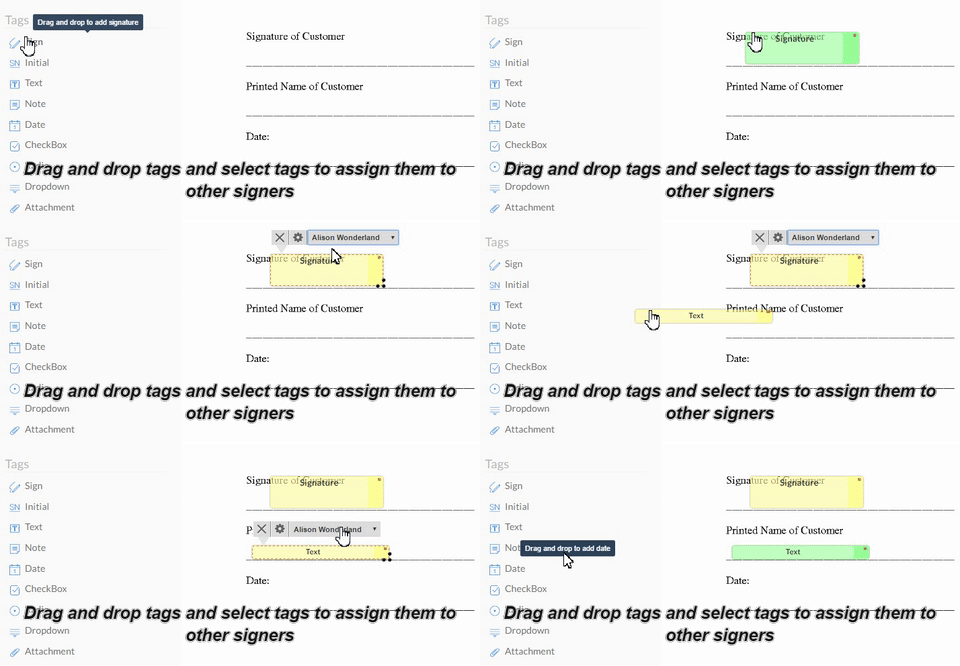
You can then begin, dragging and dropping tags from the left panel onto the document where you need to collect information from that page.
How to Reassign a Tag
If you accidentally added a tag that was assigned to the wrong recipient, follow the steps below:
-
Select the tag you need to reassign.
-
In the tolltip above the tag, use the drop-down menu and select the correct recipient.
Notice that the tag colour will change to match the recipients colour on the left panel under recipients list, making it easier for you to distinguish which tags are for which person.
Tip: Have a bunch of tags that need to be reassigned? Save time with multi tag editing.