

Once your documents have been uploaded and all recipients have been added, the next step is to place tags. Tags are the fields that allow recipients to complete the document—whether that means providing a signature, entering initials, or filling in additional information.
In Signority, each tag is assigned to a specific recipient, ensuring that every required action is completed by the right person. By carefully placing and assigning tags, you can guide recipients through the document and collect all necessary information in a clear and organized way.
Adding Tags
Tags are added within the Signority Editor. If you are working with a new document, you can access the Editor after uploading at least one file on the Upload Page and adding at least one recipient on the Recipients page and then clicking Next in the top-right corner. This will open the Editor, where you can begin placing tags.
If you are working from a saved draft or template, you will be brought straight to the Editor. However, you must still ensure that at least one file and one recipient have been added before you can start placing and assigning tags.
Once you are in the Editor, follow these steps to add and assign tags:
-
On the left panel of the Editor under Recipients, choose the recipient it will be assigned to so the correct person completes the field.
-
Using the Document Thumbnails list on the right of the Editor, select the page you want to add tags to.
Note: If you can not see the page Thumbnails, the panel may be collapsed. Select the double arrow icon in the top right to expand it.
-
Below the Recipients, under the Tags section, drag and drop tags onto the document.
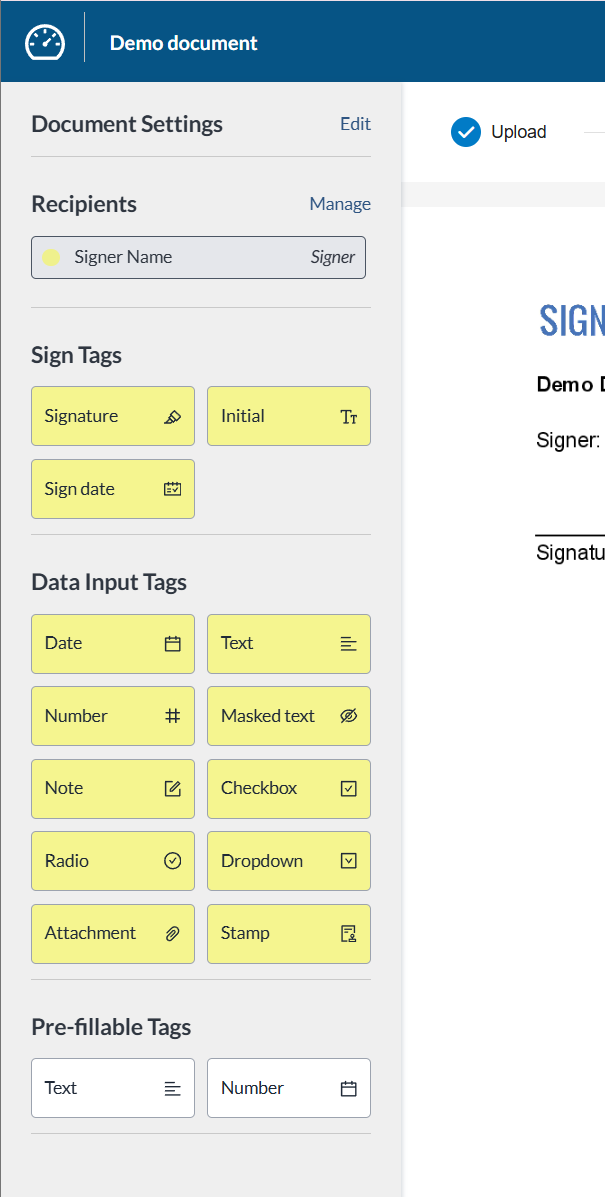
Want to learn more about the types of tags Signority offers, what they do, or how to customize the tags properties? See, Signority Tags Overview.
Edit a Tag's Settings
-
Select the tag you wish to edit.
-
The tag's settings will open to the right of the page.
-
In the settings panel, you can rename the tag, change the tags font size, make the tag optional, and more. For a full breakdown of the available tag properties and what they do, see Tag Properties.
Remove a Tag
-
Select the tag you wish to remove.
-
On the tooltip menu that appears above the tag, select on the trash icon to remove the tag.
Further Reading