

In this article, you’ll learn how to import PDF form fields as tags when uploading a document into Signority. This feature automatically converts fillable PDF fields into assignable tags, making it faster to prepare documents for signing.
Importing PDF Form Fields as Tags from the Upload Page
-
Start a new document by selecting + New > New Document.
-
On the upload page, make sure that the upload option Import PDF Fields toggle located below the upload area is enabled.
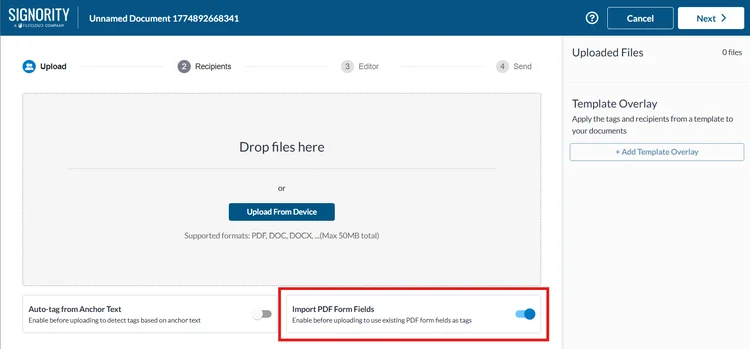
Important: This must be enabled before uploading your files for Signority to know to scan for them.
-
You can then proceed with uploading your PDF with form fields and any other files you would like included in your document package from your device by either dragging into the grey area or clicking Upload from Device.
-
Click Next.
-
On the recipients page, you will see that a recipient has been automatically generated. Edit the name and email address of the recipient and add any other recipients who may need to receive the document for signing.
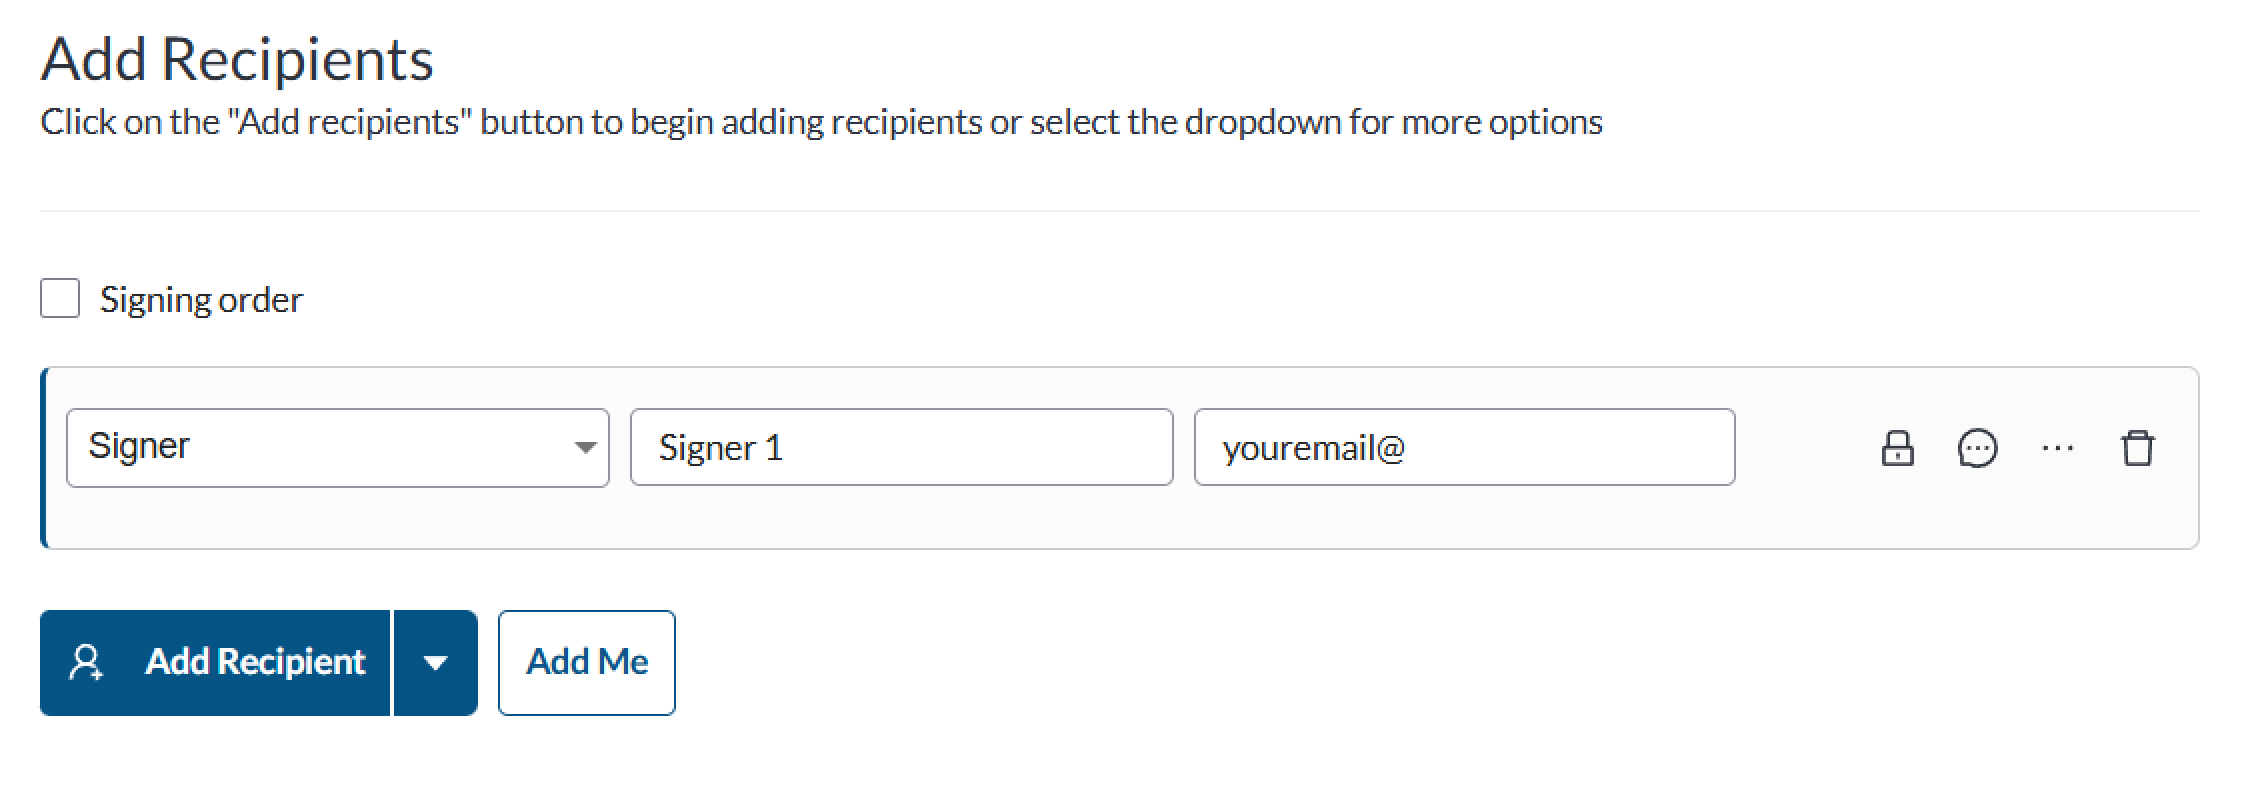
Important: DO NOT DELETE THE ORIGINAL RECIPIENT. All of the tags created from the PDF form fields will be assigned to this recipient. Deleting the recipient will automatically delete the tags. If there are multiple signers in the workflow, you will need to go through and assign the tags to the correct recipient. Learn more about assigning tags when importing PDF form field files here.
-
[Optional] If required, add any other recipients to your document workflow by selecting Add Recipients. For more detailed steps about recipients, see Add and Manage Recipients.
-
Click Next once you have added in all the information for your recipient(s).
-
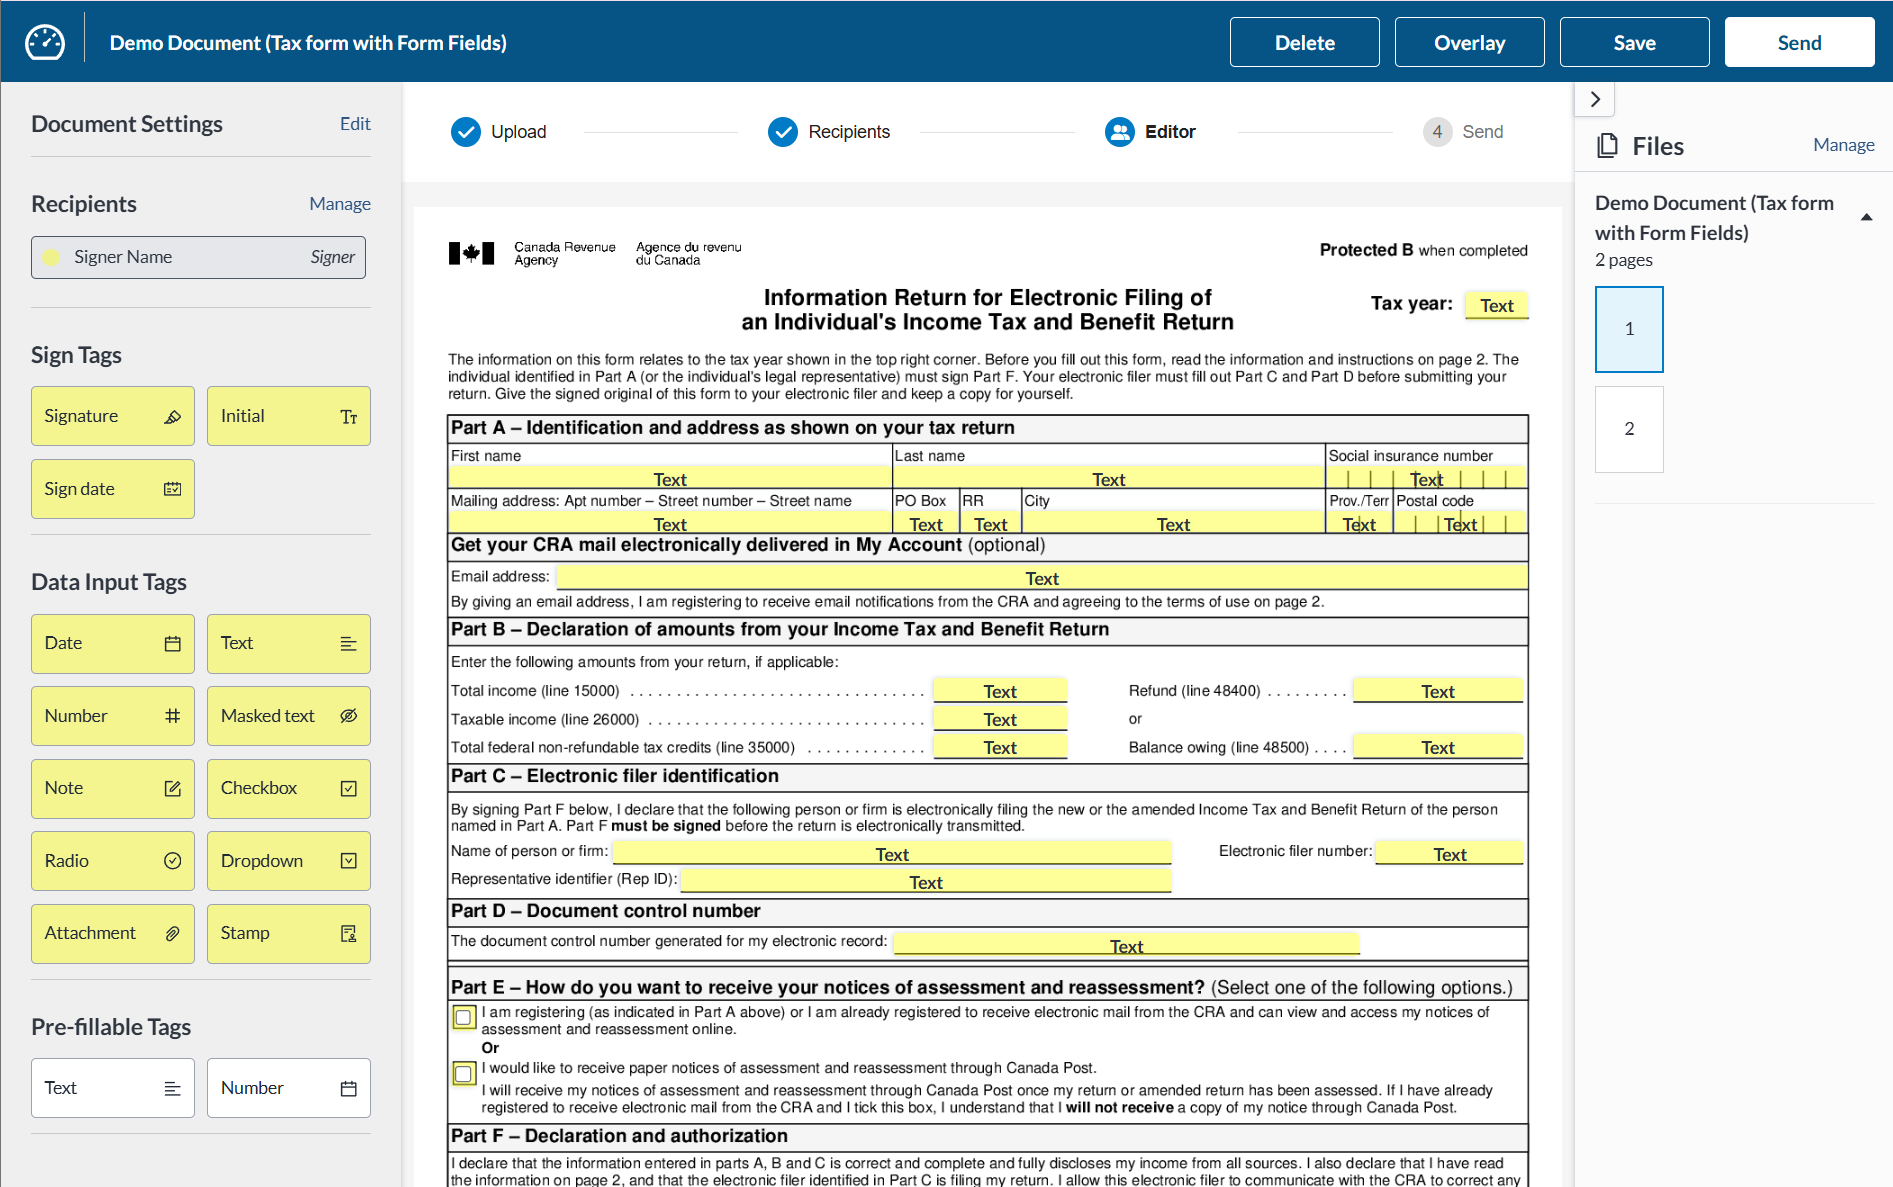
On the Editor, you should see that there are tags placed at each PDF form field. Finish setting up your document by adjusting any settings or adding/removing any tags as needed.
-
Once the document is ready for signature, send the document for signing!
Importing PDF Form Fields to a Document or Template from the Editor
If you are adding a new file to your eSignature document on the Editor for either documents or templates you can do so in the Files pop-up window.
-
On the right of the Editor, select Manage next to Files or if there aren’t any files uploaded yet to your document/template, select the Add Files button in the middle of the screen.
-
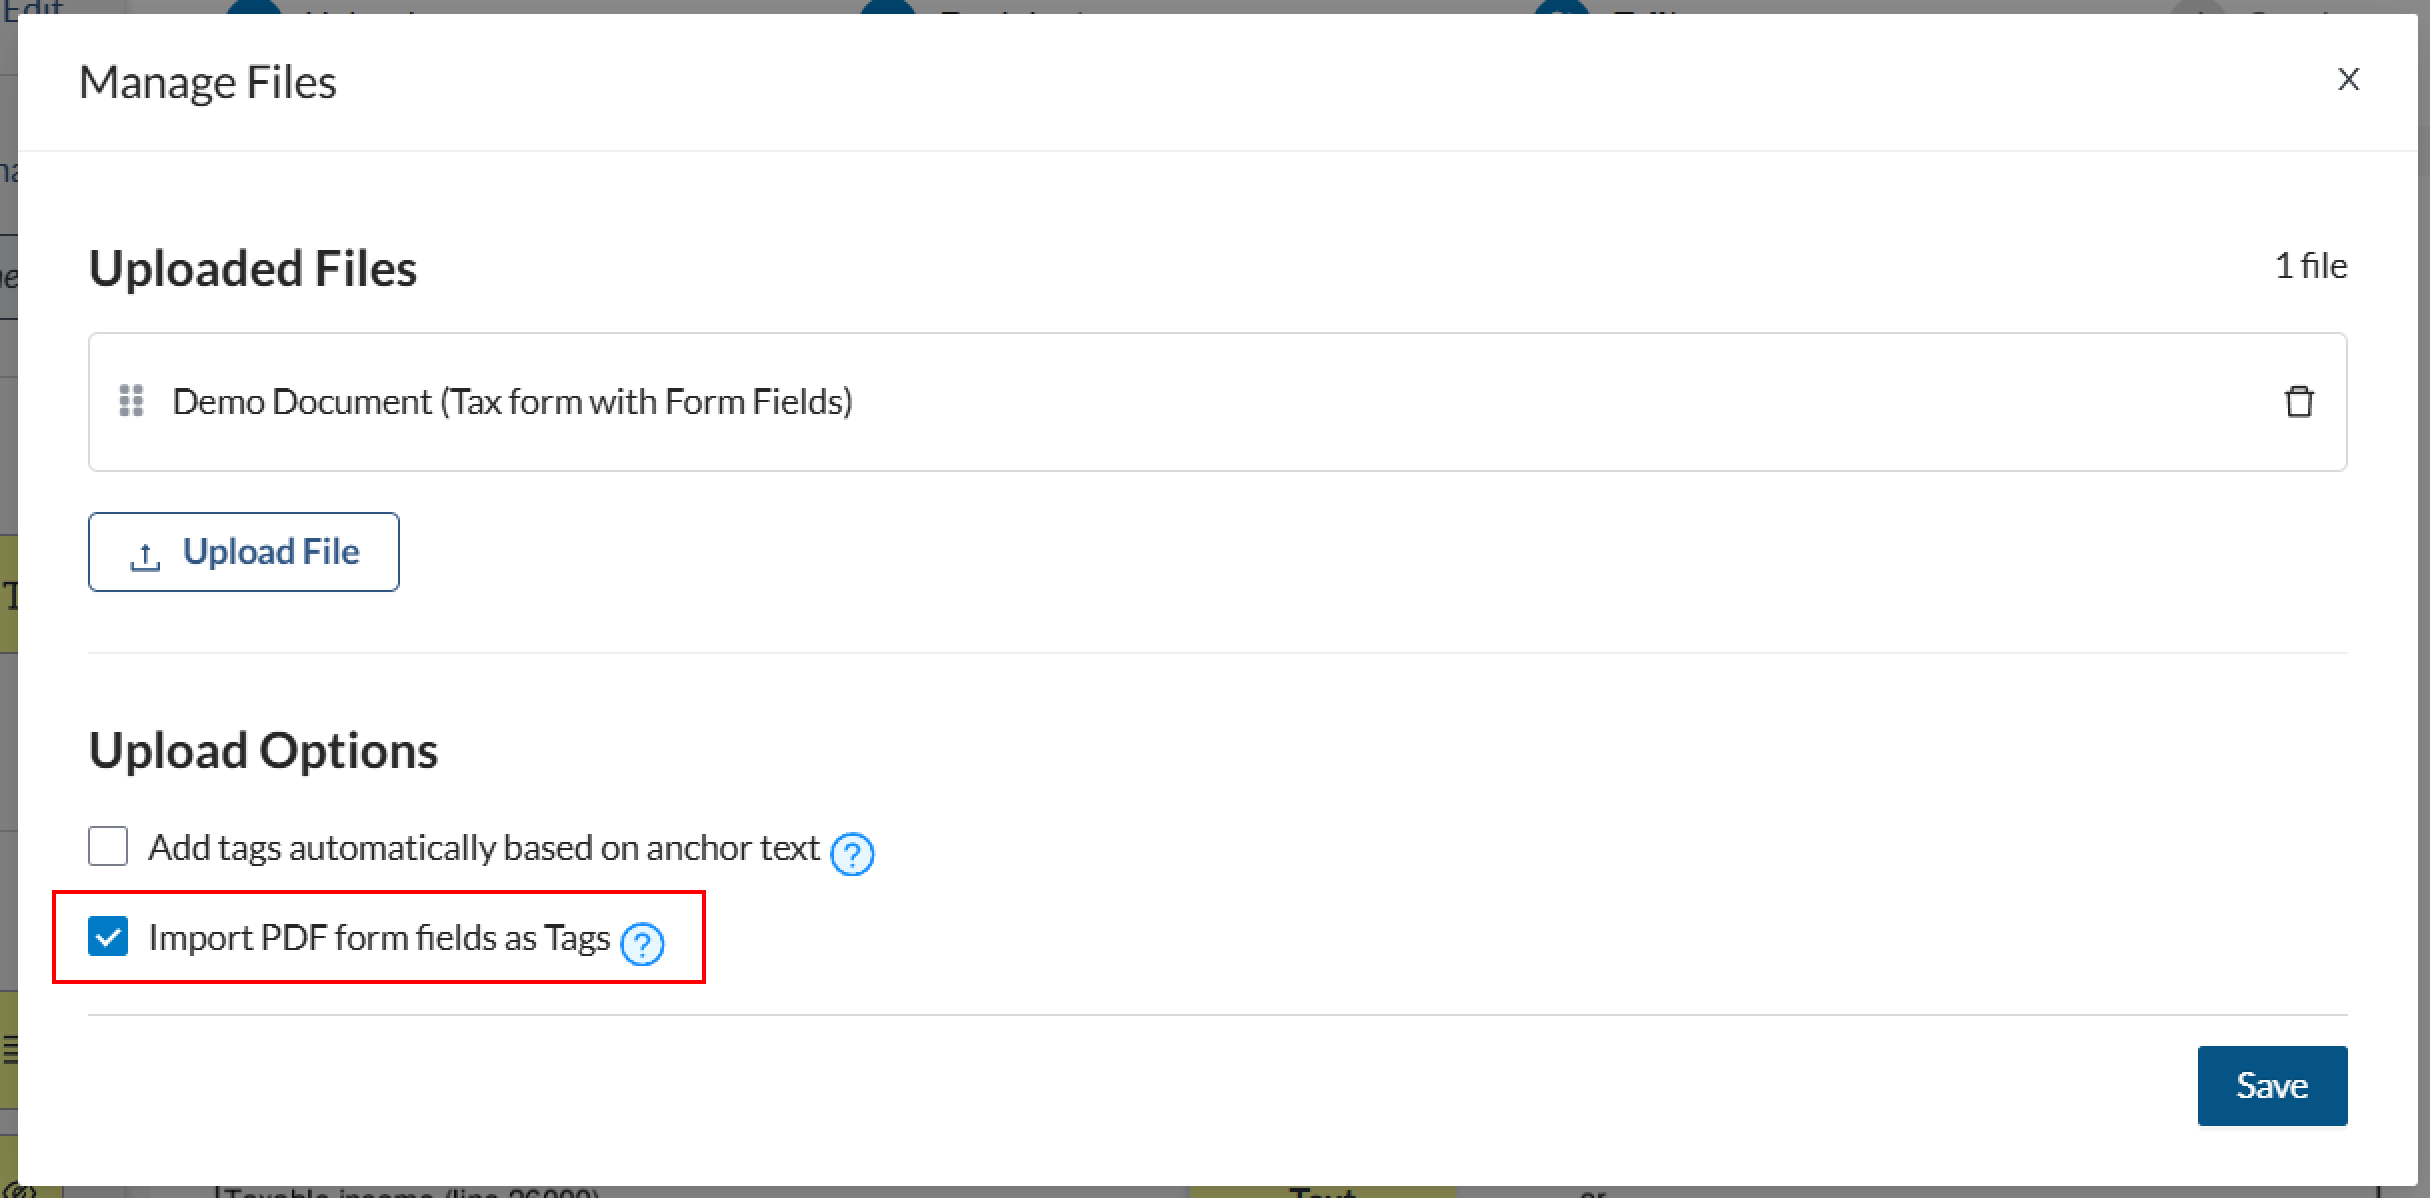
In the Manage Files pop-up window, ensure that the checkbox next to Import PDF form fields as Tags is checked.
-
You can then upload your PDF files by clicking Choose Files.
-
Click Close when the files have been uploaded.
-
On the Editor, you should see that there are tags placed at each PDF form field.
Important: All of the tags created from the PDF form fields will be assigned to the first recipient in the workflow. DO NOT DELETE THIS RECIPIENT. Deleting the recipient will automatically delete the tags. If there are multiple signers in the workflow, you will need to go through and assign the tags to the correct recipient. Learn more about assigning tags when importing PDF form field files here.
-
Finish setting up your document by adjusting any settings or adding/removing any tags as needed.
-
Once the document is ready for signature, send the document for signing or if it is a template you can make sure it is saved and then select the dashboard icon in the top left of the header to exit the editor.
Assigning tags when uploading a PDF with form fields
When uploading a PDF with form fields on the Editor, the tags will automatically be assigned to the first recipient on the recipients list. If you wish to assign all the tags to a specific recipient but not necessarily the first recipient on your list. You will need to temporarily place that recipient at the top of the recipients list before uploading your PDF with form fields. See, Adding A Signing Order for Your Documents to learn how to reorder recipients.
If only some of the tags will be assigned to a different recipients, you can select multiple tags and change their recipient simultaneously. To learn how to do this, see Multi-Tag Editing for Faster eSign Prep.