

Sometimes after sending a document for signing, you may realize something was missed—such as a missing file, an incorrectly assigned tag, or outdated information. With Signority, you can cancel and resend the document, as long as its status is In Progress.
Note: If you only need to update a recipient’s email, see How to Update or Change a Recipients after Sending a Document.
-
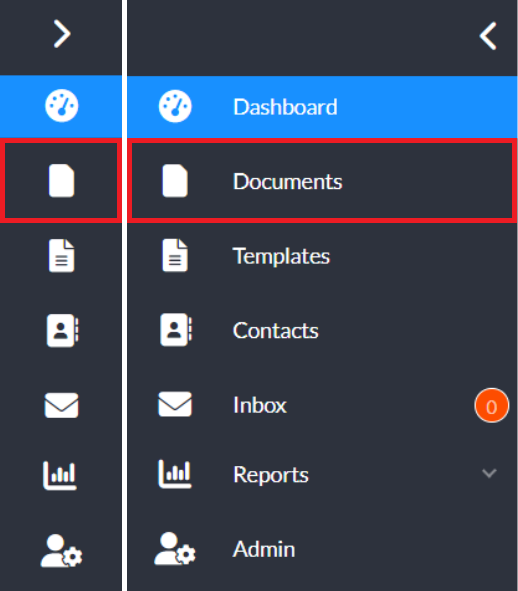
From the Signority user dashboard, click Documents in the left-hand navigation menu.
-
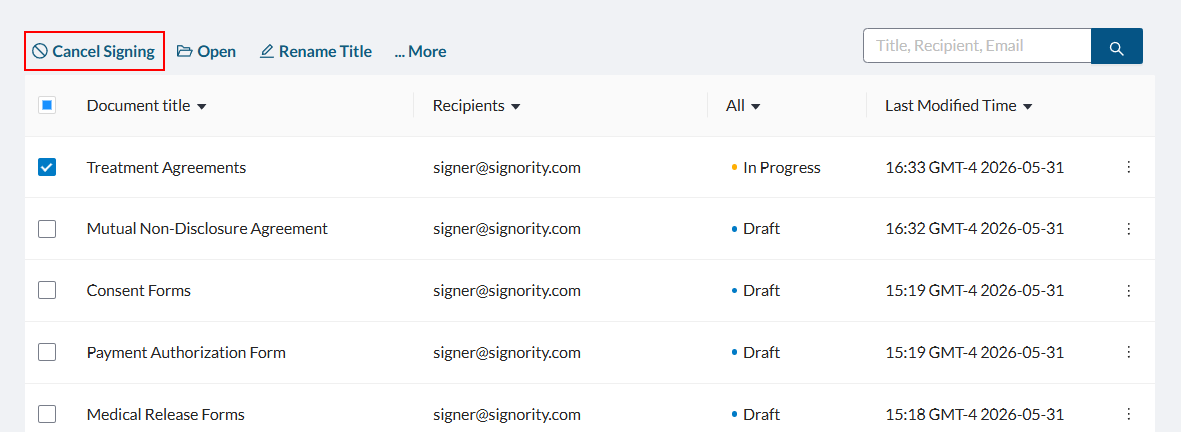
Locate the document that you want to cancel to resend and select the checkbox beside it.
-
In the action menu that appears above the documents list, select Cancel Signing.
-
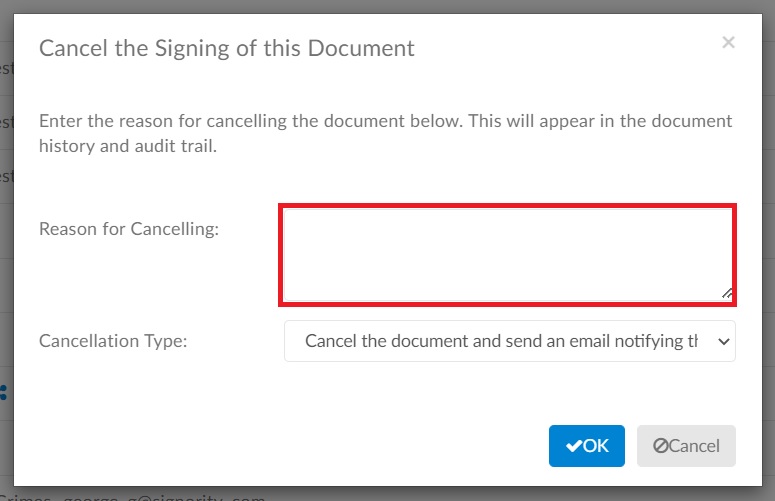
In the Cancel signing pop-up window, enter the reason you are cancelling the document in the text area. This will be recorded in the audit trail.
-
From the Cancellation Type dropdown, choose what will happen after cancelling the document. There are four options but the last two are used for resending a document.
-
Cancel the document and send an email notifying the signers - Sends an email notification and cancels the document without creating a copy.
-
Cancel the document and do not send an email to the signers - Cancels the document without creating a copy or alerting recipients.
-
Cancel the document and create a copy to resend with added content - Creates a copy of the document package, including workflow, recipients, tags, and any previously entered data (except signatures/dates).
-
Cancel the document and create a copy to resend without added content - Creates a copy of the document package, but excludes any data previously entered by recipients.
-
Note: Completed signatures and dates are never copied, regardless of the option selected.
-
Click Cancel Signing to finish cancelling the document.
-
On the documents list, the new copy will appear at the top of the list with a status of Draft, and the original document will appear beneath it with a status of Cancelled.
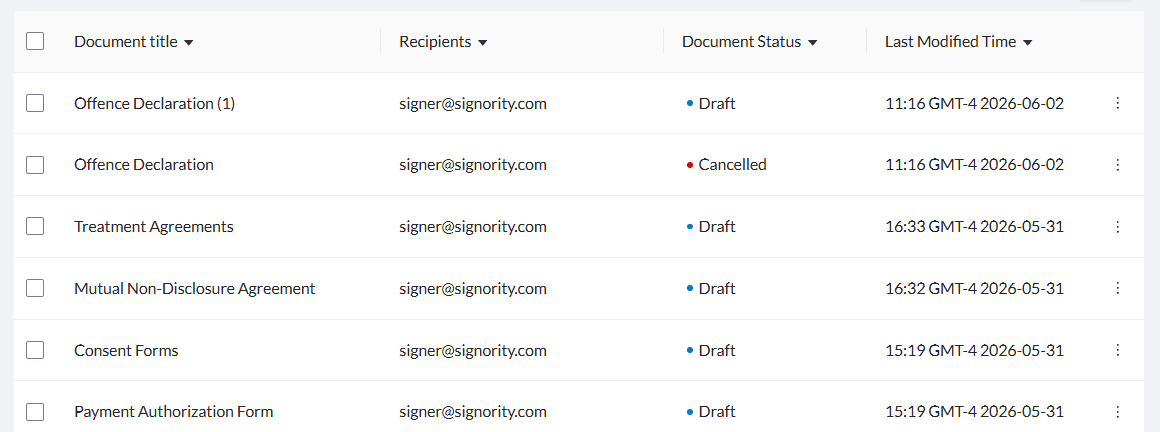
Note: The new copy will automatically be named the same as the original document, with a number added in brackets at the end. If you want the new document to have the original name, you must first rename the cancelled document, then rename the new draft. For more details, see How to Rename a Document Package.
-
Open the new copy of the document package by clicking on the name or selecting the checkbox and clicking Open.
-
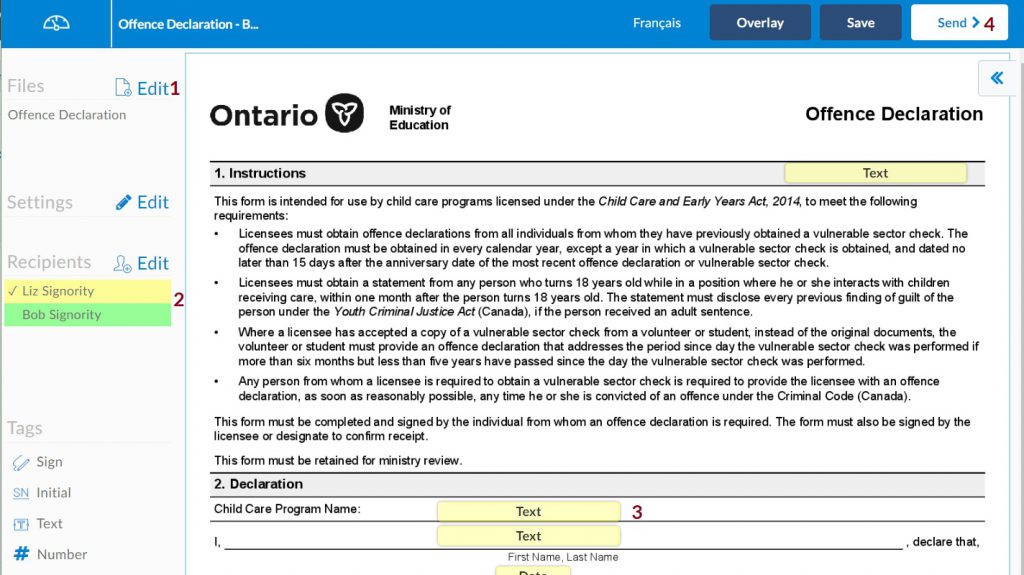
On the Editor, review the document to ensure the files, workflow, recipients, and all your tags were copied over correctly. You can also make any necessart changes.
-
Once you have completed the corrections click Send in the upper right.
How Cancelled and Resent Documents are Reflected in the Audit Trail
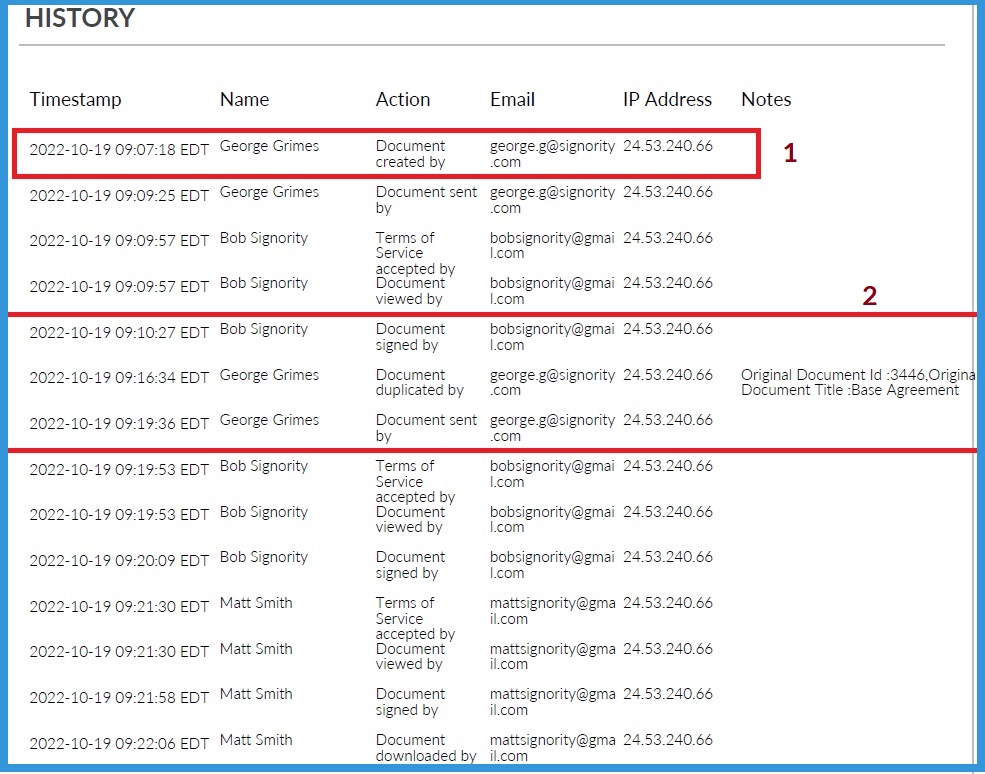
Your Audit Trail will reflect the path from the creation of the first document package to the final signature applied to the second copy of the document package. Notice that the audit trail of both documents is combined into one as shown below:
-
The creation date/time of the first document sent.
-
In the second box:
-
The signature that was applied,
-
the time / date the document was cancelled and duplicated, and
-
the time/date it was sent out for signature again.
-