

Getting signatures online is exactly what Signority is for. This article will cover the basics of how to start a new document, upload files, add recipients, add tags, and send the document for signature in just a few steps so you can begin collecting signatures.
How to Create and Send a Document for Signature
When you create a new document in Signority, you are lead through the Document Design Workflow. This helps to break down the steps and leads you through the process of setting up your document for eSignature. There are four key steps in this workflow:
-
The Upload page, you can upload the files to your document package that you want your recipients to review & sign.
-
The Recipients page, where you can add your recipients and customize the email message and notification settings.
-
The Document Editor, where you can add tags for recipients to fill and finish preparing your document for signature.
-
And finally Sending your document out for signature.
To start, create a new document by selecting +New > New Document in the top header.
Step 1: Upload your files
Begin by uploading the files you wish to add to your eSignature document.
-
Add files from your device by either dragging and dropping it into the grey area or selecting Upload From Computer. Signority supports all common file types: .pdf, .png, .jpg, .jpeg, .word, .docx, and more.
Note: Each plan has a set document size limit that applies to your uploads. Learn more about file size limits here.
-
A message will appear when a document is successfully uploaded and will be listed on the panel on the right under Uploaded Files.
-
Click Next in the top right to go to the Recipients page.
Step 2: Add your Recipients
-
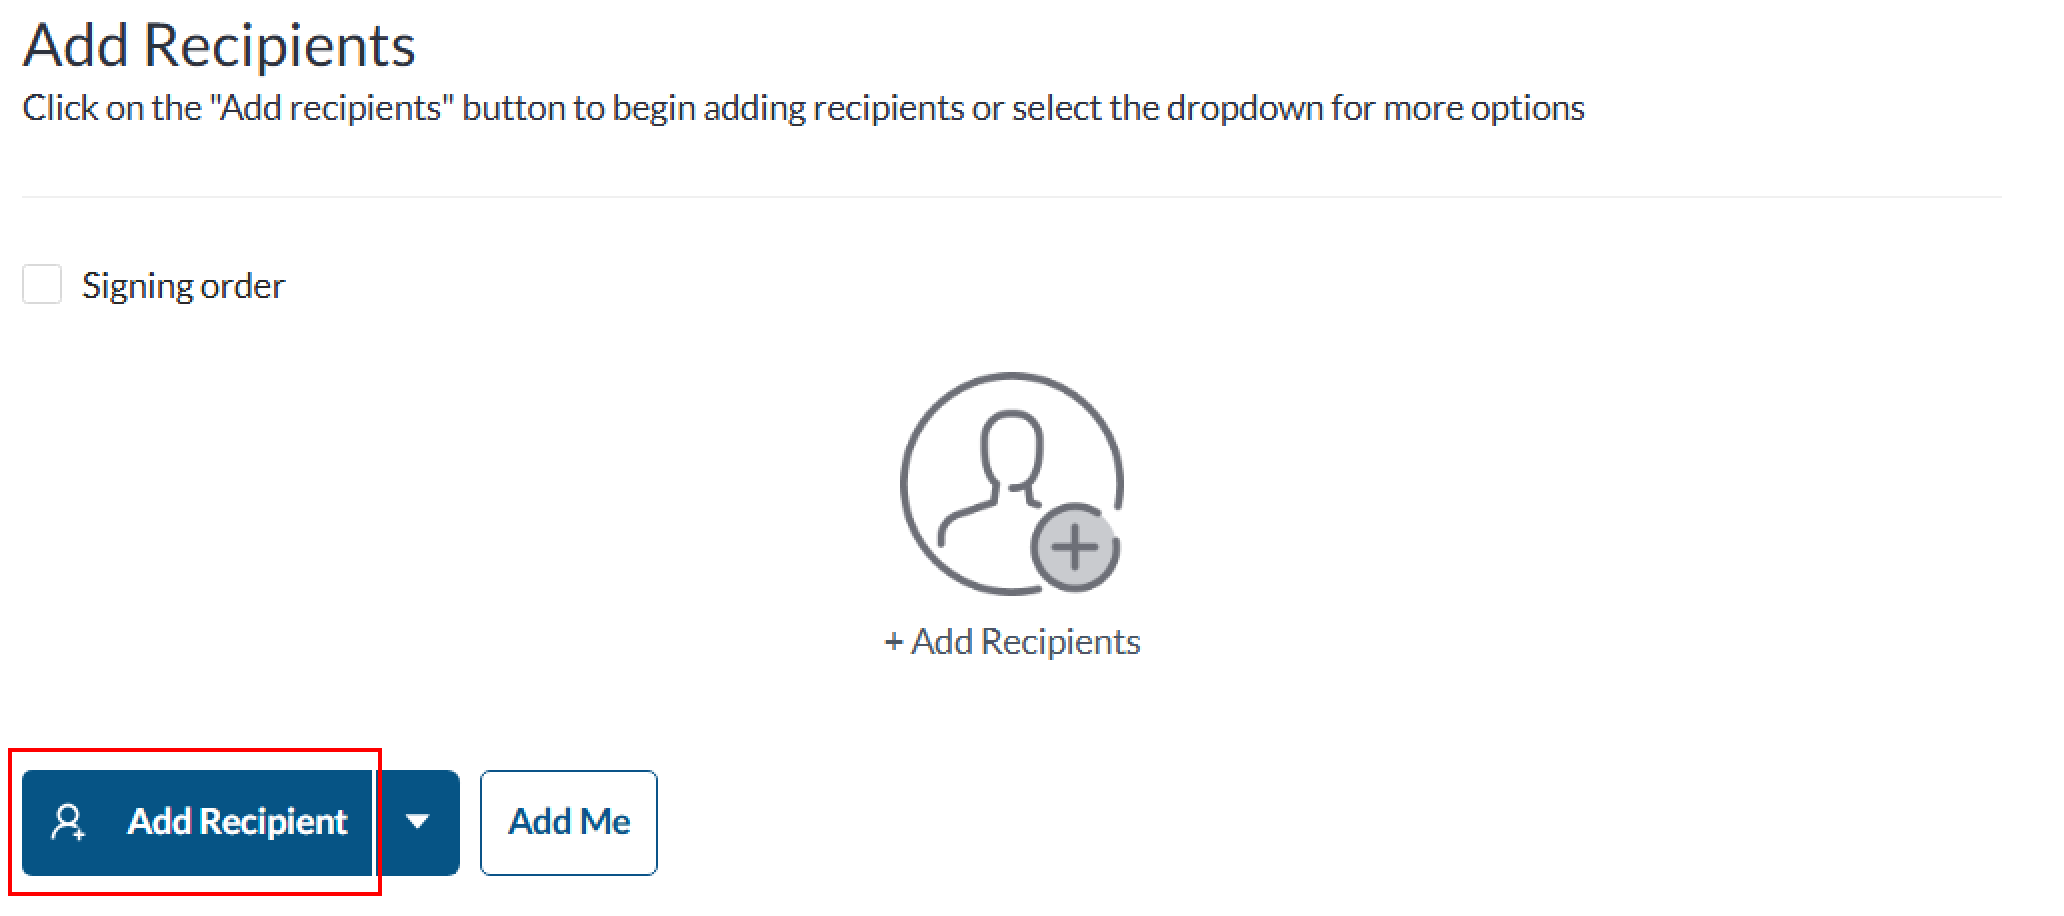
On the Recipients page, select Add Recipients.
-
On the recipient that appears, enter their name and email address in the fields.
-
Repeat this process until you have added all the necessary recipients for your document.
Tip: If you will be a recipient, you can simply select Add Me and Signority will automatically create a recipient with your information.
-
[Optional] You can also create a signing order by selecting the Signing Order checkbox and reordering the recipients by either dragging them or typing in their order number. This allows you to create a sequence for your signers and further customize the workflow to fit your needs.
Step 3: Add the Email Subject and Message
Signority automatically adds an email subject when you upload a document however, you can customize this as well as add a custom message to the invitation email for all recipients in the fields under Invitation Email on the right panel.
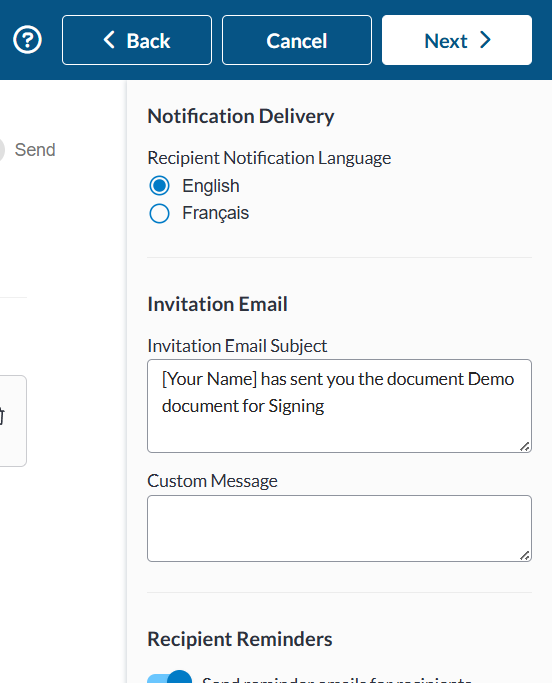
For a more indepth tutorial, see Customizing Recipient Invitation Email Subject Line & Message.
When you are done, click Next to go to the Editor.
Step 4: Add Tags to Document
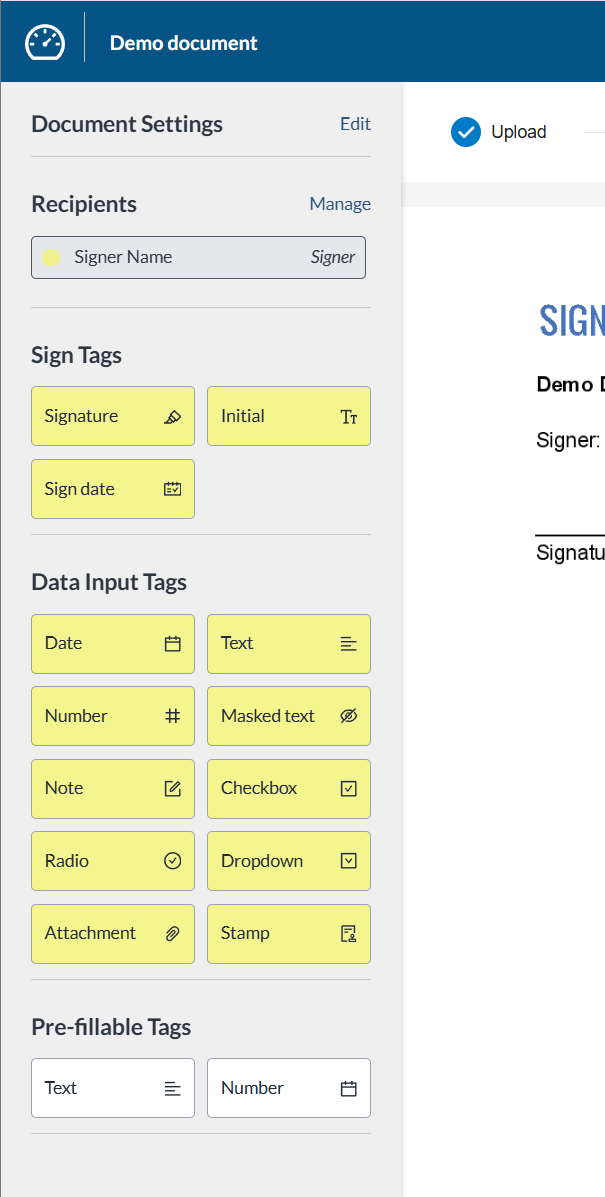
Youa re now ready to start adding tags to your document. If your document has more than one signer, we suggest first selecting the which recipient you wish to assign tags to under recipient in the left panel of the Editor.
Below the recipients, there are three tags sections for different types of tags: Sign Tags, Data Input Tags, and Pre-fillable Tags. To learn more about the types of tags Signority offers and what they do? See, Signority Tag Types.
You can then proceed with adding your tags following the steps below:
-
Using the right file thumbnail previews, locate the page in your document that requires a tag.
-
Select the tag you want to add and drag and drop the tag onto the correct place on the document.
-
With the tag selected, you can adjust the tags settings such as font size or making a tag optional on the tag settings panel that appears on the right of the editor.
-
If you want to modify or remove a tag, you can simply select it. On the actions menu that appears above the tag, you can click on the X to delete the tag or select the drop down menu with the recipients name to change recipients.
Note: Once you change the recipient for tag, any new tags you add will be assigned to them as well. You will need to change the recipient again on the left of the Editor if you wish to add tags for a different recipient. You can find more information on assigning tags here.
-
Repeat these steps until all tags had been added for each recipient.
Step 5: Review and Send the Document
-
Once you are finished designing the document, click Send in the top right of the header.
-
If you have eSignature and Digital Signatures enabled for your account, you will be prompted to select which signature type you would like used on this document package.
-
When it's successfully sent, you will be taken to a Congratulations page to confirm that it was sent properly.
Congratulations on sending a document with Signority!
If you need more information, check out our video below and get a step by step on how to create electronic signature documents from scratch.