

After you have created your document on your desktop with your anchor text, here’s how to upload it to Signority:
-
Begin by creating a New Document.
-
On the upload page under the upload area, make sure that Auto-tag from Anchor Text is enabled.
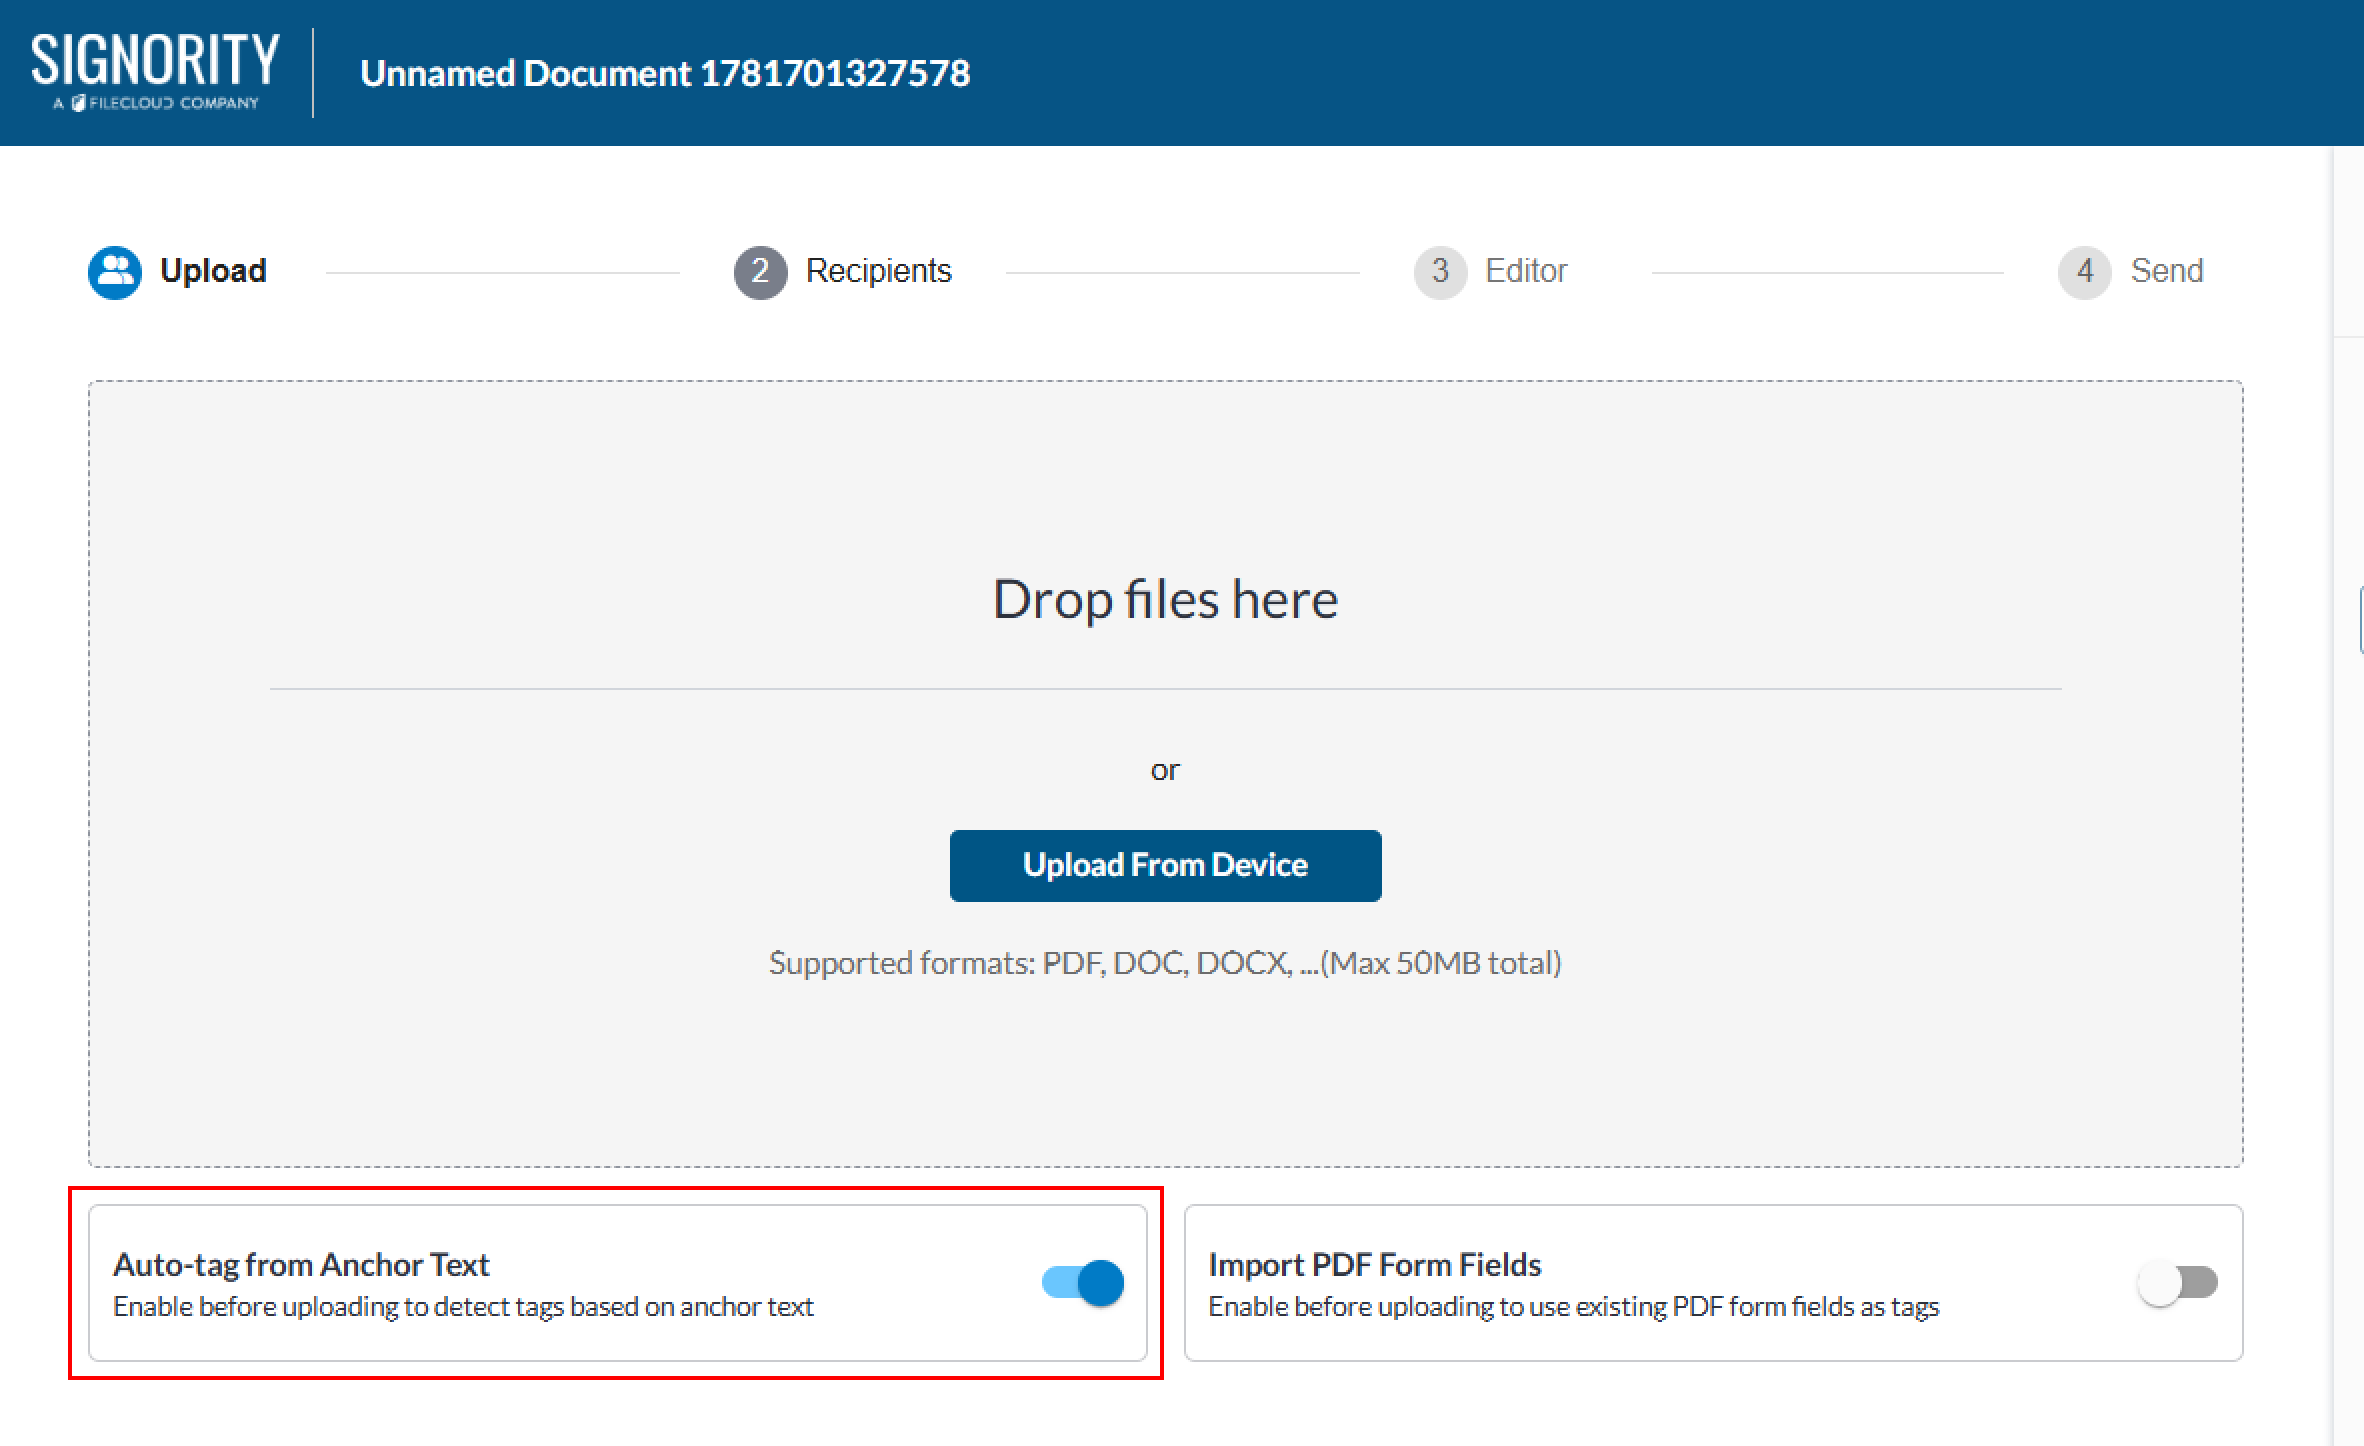
Tip: Billing and Super Admins can enable Auto-tag from Anchor Text by default to automatically can all uploaded files by their team in Global Settings. To learn more, see Enable Add Anchor Text by Default.
-
You can then proceed with uploading your documents as usual.
-
When you proceed to the recipients page, Signority will automatically have detected the number of recipients required based on your anchor text. Enter the recipients names and emails into the autogenerated recipients.
-
Adjust any other settings and then click Next.
-
In the document editor, you will see Signority will have auto-tagged each of the tags where you inserted anchor text.
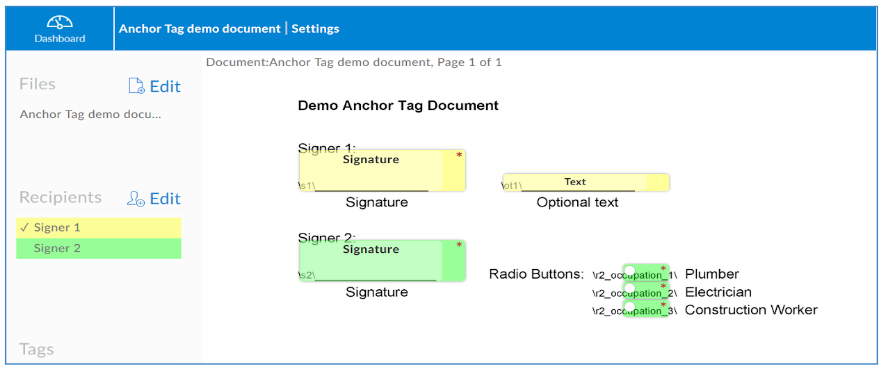
Note: For the sake of demonstration, we’ve made the anchor text black. Once the document is ready you will want to change the text colour to be white so that it can’t be seen.
-
Double check to make sure everything is in the right place and the size you need.
Note: The first few times you create a new document or template with Anchor Text you may notice that you are needing to adjust the position of any surrounding text or content to accommodate the tag size. You can chose to the this manually, or you can also define tags sizes within the anchor text strings themselves. To learn more, see: Sizing Anchor Text Tags.
-
Make any other necessary changes to your document, then click Send.
Note: Anchor text can also be used in API integrations with Signority. For more information about our API, you can check out our online API documentation.
Further Reading