

When sending documents for signature, senders have the option to allow recipients to:
-
Add their own Stamp tag to a document
-
Allow specific recipients to be able to place a Stamp tag anywhere on the document during signing, even if one was not pre-assigned by the sender.
-
Disabled by default
-
-
Apply their own stamp image during signing
-
Allows recipients to upload their own image to stamp tags when signing the document rather than limiting them to only using the stamps pre-defined for them by an admin.
-
Enabled by default
-
Note: Your account defaults may differ depending on the global or team settings configured by your Billing Admin or Super Admin.
Admins can enable, disable, or enforce these options in: Admin Console > Global Settings or Team Settings > Signer Options. (To learn more, see Signer Options)
This provides flexibility in workflows where the sender may not know in advance where or which stamp needs to be applied.
Allow a Recipient to Add Stamp Tags During Signing
To allow a specific recipient to add their own stamp tags:
-
Create a new document and upload your documents, or go straight to the Recipients page.
-
Select Add Recipients and enter the recipient’s name and email address.
-
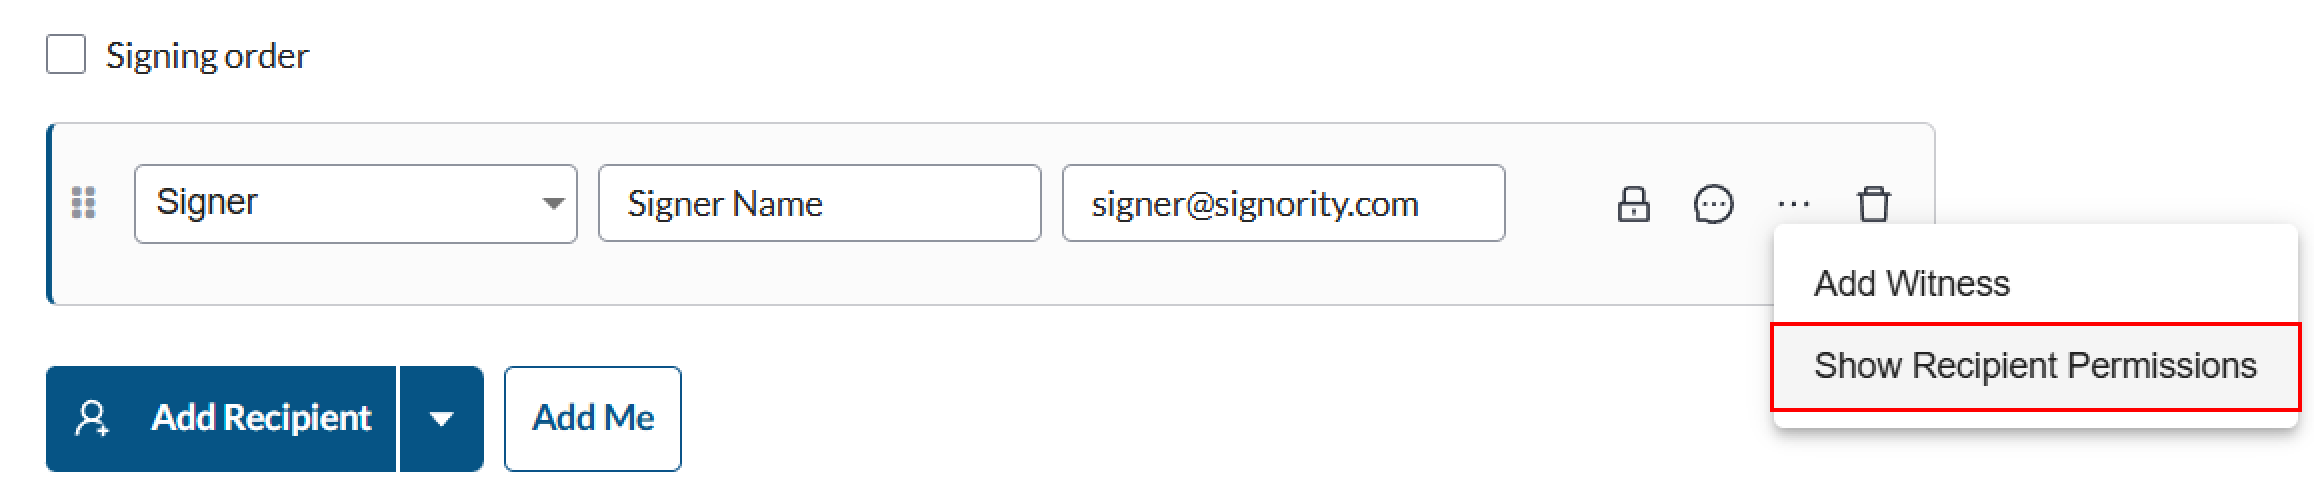
To the right of the recipient, click the Elipsis (⋯) icon and select Show Recipient Permissions.
-
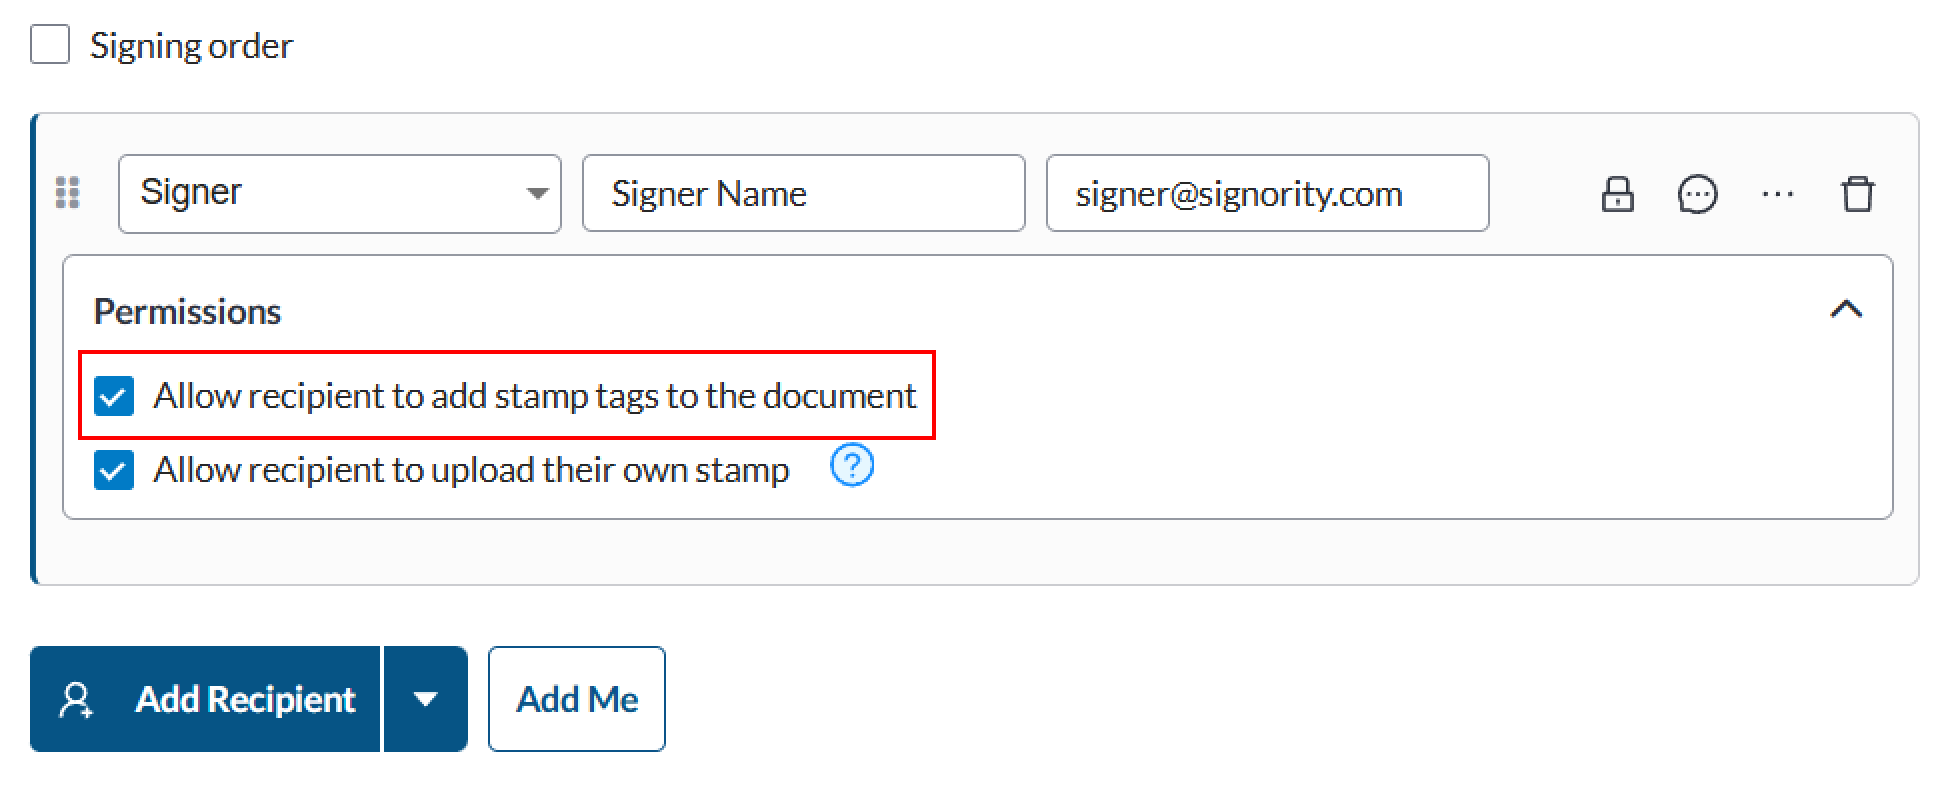
Enable Allow recipient to add stamp tags to the document.
Enable or Disable a Recipient’s Ability to Upload Their Own Stamp
During signing, if a recipient has been assigned a stamp tag or adds one themselves, they can:
-
Upload their own stamp image, or
-
Select from predefined stamps (if configured – see Predefining Stamps)
This option is generally enabled by default, hwoevsender at the time of sending and may depend on admin-level settings.
To control whether a specific recipient can upload their own stamp image during signing:Create a new document and upload your documents, or go straight to the Recipients page.
-
Select Add Recipients and enter the recipient’s name and email address.
-
To the right of the recipient, click the Elipsis (⋯) icon and select Show Recipient Permissions.
-
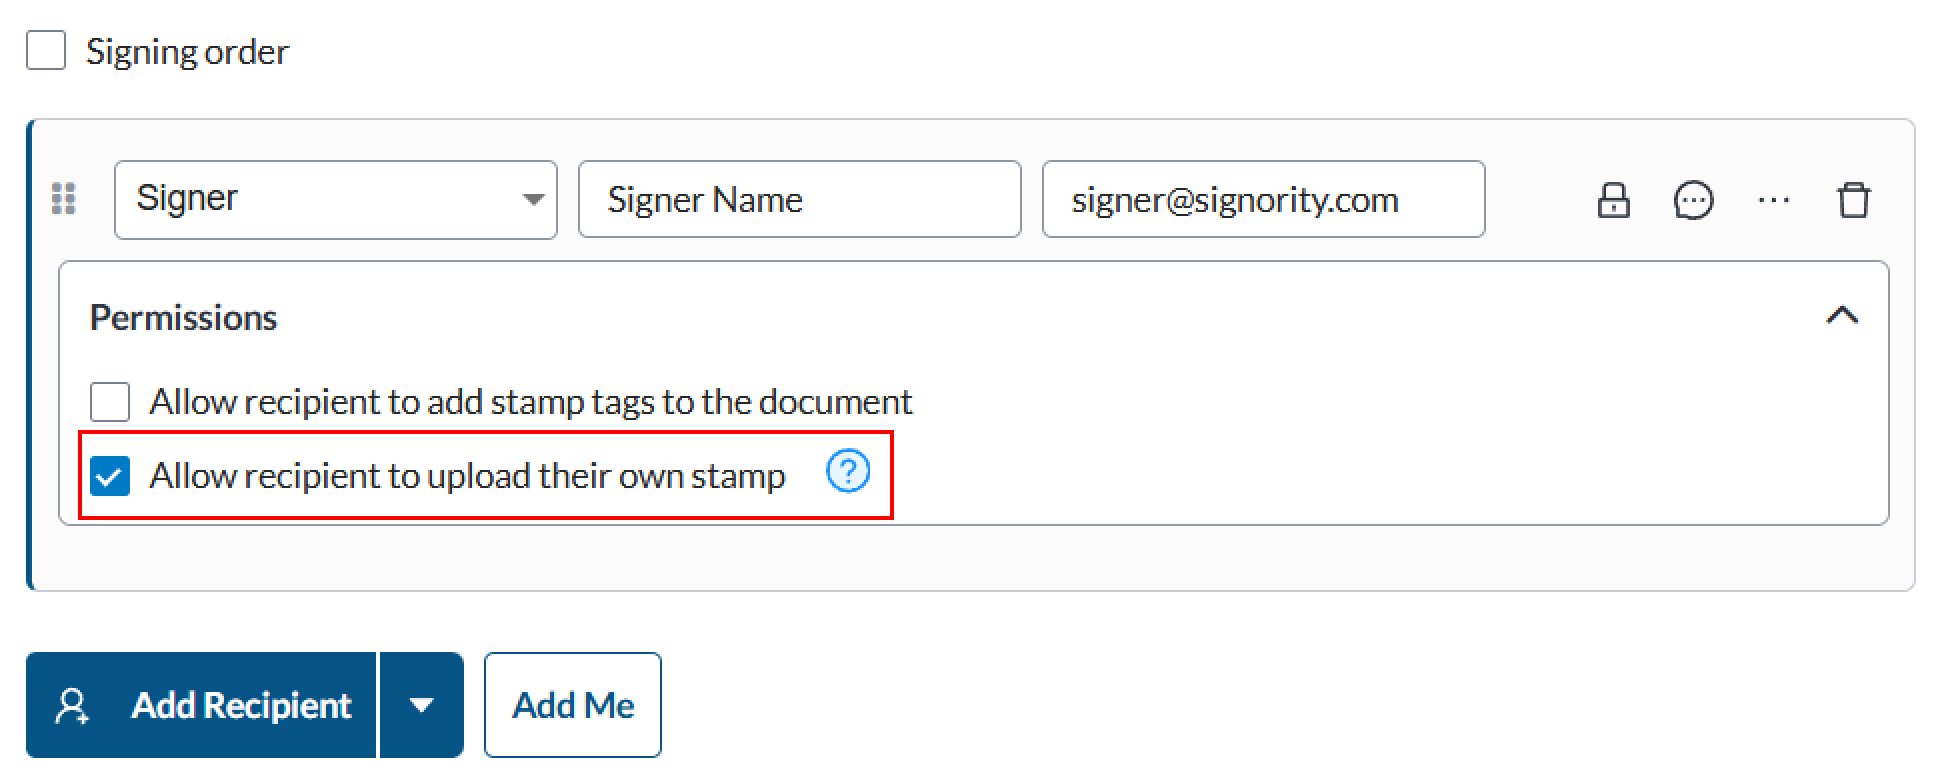
Enable/Disable Allow recipient to upload their own stamp.
Note: Stamps that are uploaded during signing are not save to your account. Stamps can only be pre-defined for future use by Billing and Super admins.