

Conditional Signers are a recipient type that allow the sender to automatically route a document to different recipients based on values entered in the document (like price, amount, or other numeric fields).
Note: Conditional formula’s and conditional routing currently only work with pre-fillable tags.
Setting up a document or template for conditional routing
Step 1: Create a New Document or Template
Begin by creating a New Document or Template and uploading your files as usual.
Step 3: Add Prefillable Tags
Note: If you are creating a New Document, after uploading your files on the Upload page, skip the recipients page by clicking Next to proceed directly to the Editor.
-
Place all required prefillable tags (these hold the values used in conditions) Prefillable tags allow a sender to fill in information prior to sending out a document.
Step 2: Add a Conditional Signer & Configure Routing Logic
-
Open the Manage Recipients pop-up by clicking Edit next to Recipients on the left panel of the Editor.
-
On the window that appears, click Add a Recipient.
-
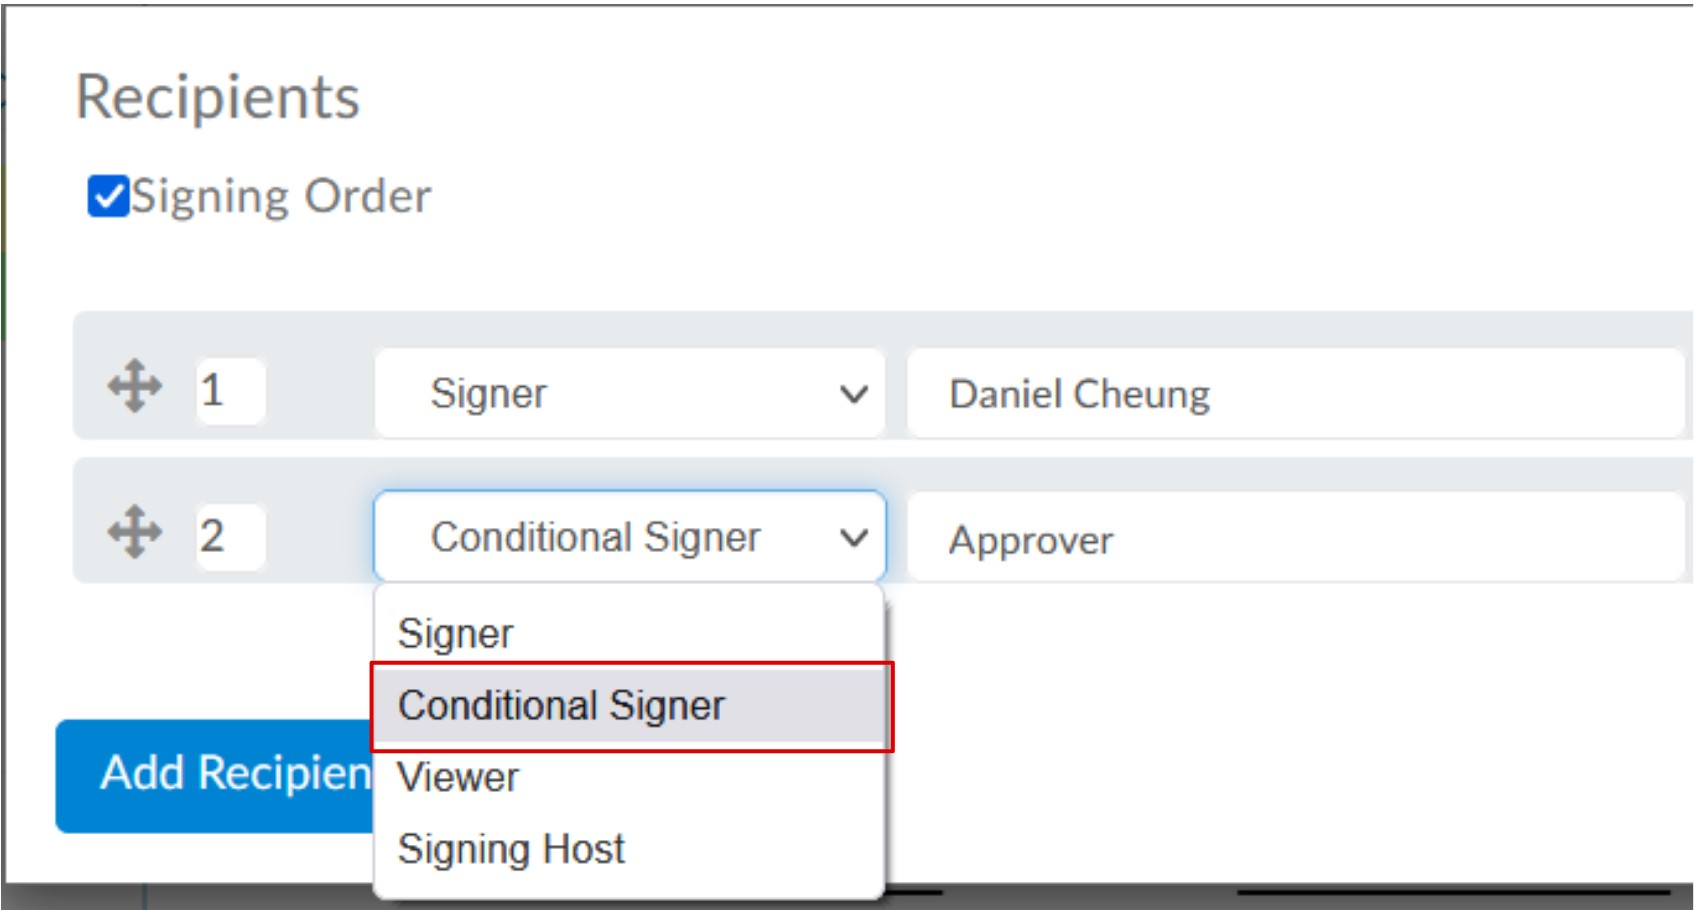
In the newly created Recipients' panel, select the Signer dropdown and change the signer type to Conditional Recipient.
-
Enter the recipients name and email.
-
On the right of the recipients' panel, click the ellipsis (⋯) button on the far right and select Create Tag Condition from the dropdown.
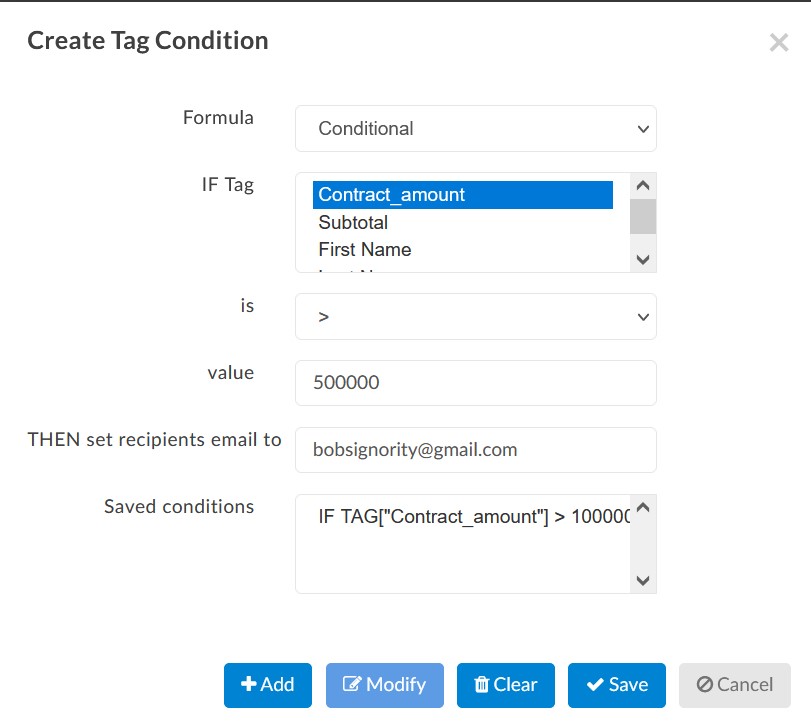
In the window that pops up, create the conditions that will dictate who the document will be routed to. Follow the steps below to create a conditions:
-
Select the type of "Formula" to be used. In this case, the only option is the "Conditional" option.
-
Select the name of the tag that you want your condition to be based on
-
Select the comparison operator that you want to use. Note that conditions are limited to comparing numerical values. The operator ELSE acts as a default condition. In other words, if none of the other conditions are met, the document will be routed to the recipient defined under the ELSE condition.
-
Type in the number against which you want to tag's valued to be compared. For example, a dollar threshold amount.
-
Type in the email address of the recipient that the document should be routed to if the condition is met.
-
Hit the "+Add" button to add the condition to the list of saved conditions.
-
Once you've put in all the necessary conditions for your conditional recipient, click Save.
Your document or template is now ready for conditional routing.
Modify or Clear Saved Conditions
-
On the Create Tag Condition pop-up window, click on the condition from the "Saved conditions" list.
-
The details of the condition will appear in the condition editor.
-
Once you've modified the necessary details, click Modify to save your changes.
To clear all saved conditions click Clear.
Reassigning Signature or Initial Tags
Signority also allows the sender to reassign a signature or initial tag to a different recipient using a condition. To use this feature, follow the steps below.
-
Create a regular Document or Template with more than one recipient
-
Place your tags
-
Locate and select the signature or initial tag that you want to reassign
-
Click on the gear icon that appears above the selected tag, and find the "Saved Conditions" line
-
Click on the ellipsis button
-
Set up your conditions. The setup process for each condition is very similar to the process described above for conditional signers. The only difference here is that instead of typing in the email address of the recipien, you can choose from a dropdown of recipients that you have already added to the Document or Template
Once everything has been setup, make sure to click "Save", and your signature tag will now be automatically reassigned to the correct recipient based on which condition is met.