

When you are setting up a document or template for in-person signing, the process remains largely the same, with the only key difference being in adding your recipients. Check out our page on creating electronic signature documents here to learn the other steps.
-
Begin by creating a new document or template.
-
Upload your files that will be part of the eSign package.
-
Proceed to the recipients page or open the recipients pop-up from the editor.
-
Select Add a Recipient.
-
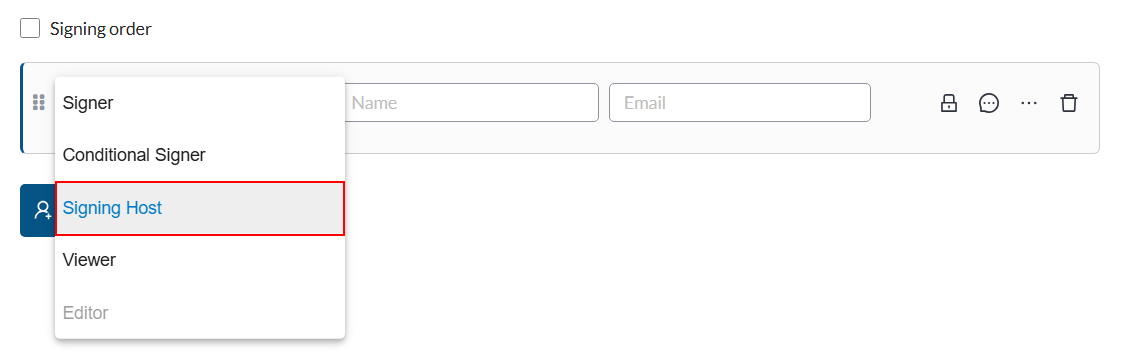
Using the recipient type drop-down, change the recipient from a Signer to a Signing Host.
-
In the In-Person Signers section that appear nested under the main recipient, enter the name and email address of the in-person signer.
-
(Optional) Since the document is not sent through an email, adding an extra level of authentication allows you to validate the In-Person Signer even further. To do this:
-
Click on the lock icon on the far right of the In-Person Signer’s row.
-
Toggle on ID Authentication and specify the type of ID you want to use for validation, such as Driver's License or Passport.
-
-
To add additional in-person signers, select Add In Person Signer and repeat steps 6-7.
-
Add any other remote signers if necessary.
-
When you’re done configuring your recipients, click Next if you are on the recipient page or Save from the recipients pop-up.
-
Follow the same process for adding custom messages and tags.
Note: Tags assigned to the in-person signer will have a house icon.
-
When the document is ready, click Send in the top right.